
Silhouette Scenes Dream Card
The Silhouette Scenes Stamp Set features beautiful silhouettes that symbolize love and adventure and sentiments to inspire your loved ones.
Not only is this stamp set beautiful stamped in black…but, check out the NEW Shimmer Black embossing powder!!! (I’m getting it on my next order!)

Measurements:
- Pretty Peacock – 5 ½” x 8 ½” scored at 4 ¼”
- Basic Black – 4” x 5 ¼”
- DSP: 4’ x 5 ¼”
Instructions:
- Ink the swinging girl in black StazOn and stamp her on the DSP, you may want to use a Stamparatus so you can stamp multiple times if need be.
- Stamp the sentiment in the bottom right corner.
- Crop the layer of black with the large tree image and add it to the DSP so the girl appears to swing from it.
- Add this to the cards base.
Product List
Stampin’ News:
- Stampin’ Up! has added tons of stamp sets to the Clearance Rack and they are only available while supplies last! See all the discounted products here
- Bonus Days are coming July 1st and that means, it’s nearly time to start earning coupon codes to redeem in August!
Here’s how it works: For every $60 you spend July 1-31 (before shipping and tax), you earn a $6 Bonus Days coupon code that can be redeemed August 1-31.

- Starter Kit Promotion
If you’ve been thinking about becoming a Stampin’ Up! demonstrator, starting July 1st is the time to turn that thought into action!
Here’s how you can get lots of extra value by signing up!
New demonstrators who sign up between July 1 and August 31 will receive an additional $40 that they’ll be able to put toward their Starter Kit (pay only $135 and choose $205 worth of products).THEN, as an additional bonus, you’ll receive a $14 coupon code the following month!
MORE INFORMATION

QUICK LINKS:
-
-
- WEEKLY NEWSLETTER & TUTORIALS: Sign up for my newsletter to get updates, specials & card ideas!
- JO JO POINTS: Earn free stamps with my VIP reward program!
- New to Stampin’ Up? Check out my STAMPING 101 TIPS here!
- CLEARANCE RACK: Save up to 60% on great products! They have some items in the clearance rack right now!!
-
To a Wild Rose Blessed Card
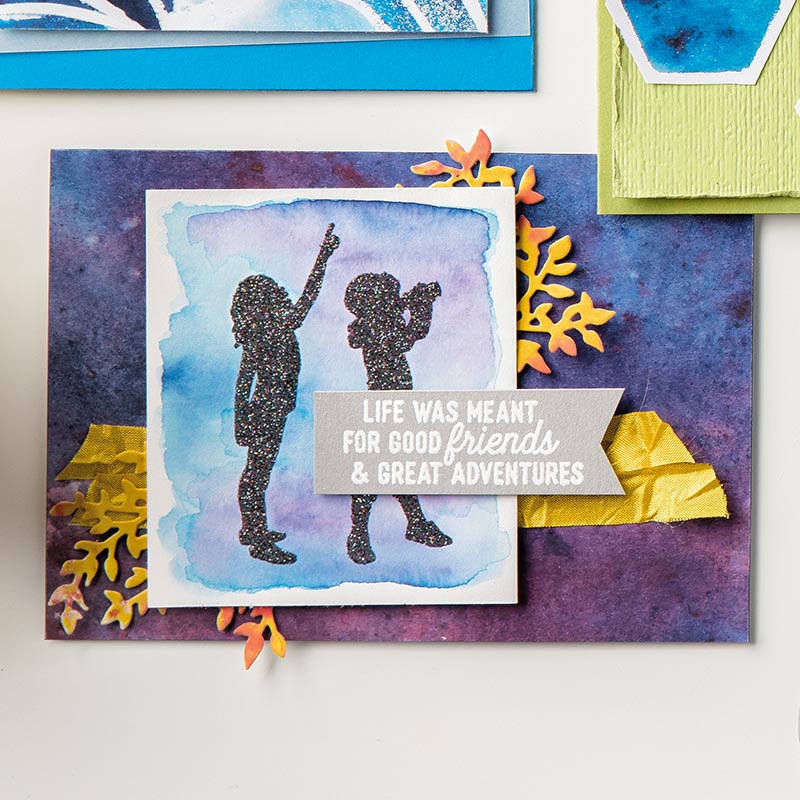
I made this card on the weekend and used one of my favourite new stamp sets and a new In Color.

We have 5 new beautiful In Colors with the new catalogue:

The To A Wild Rose Stamp Set features a regal 3-step rose.
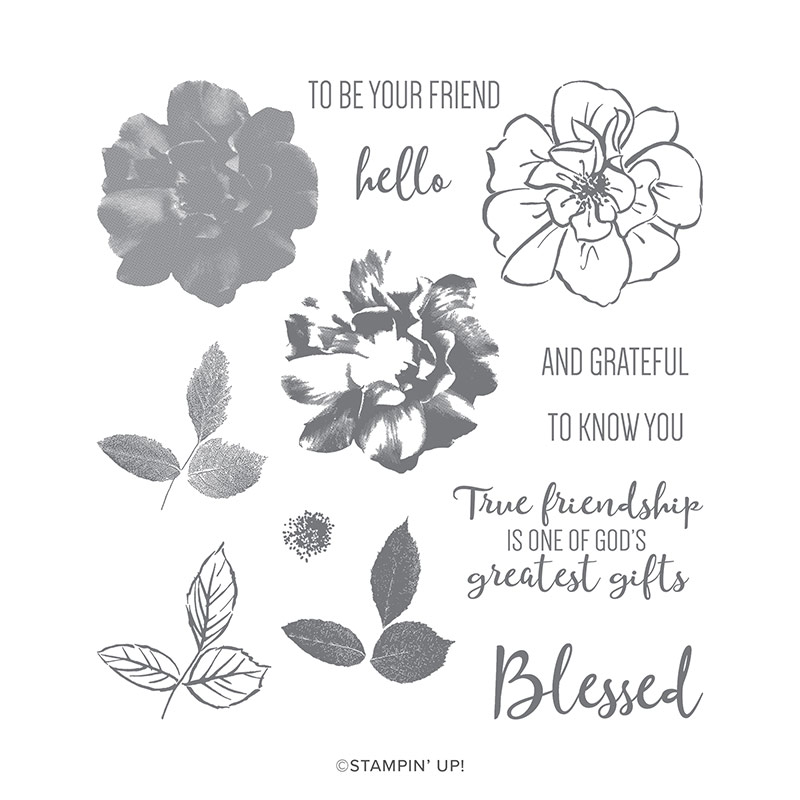
Measurements:
- Terracotta Tile: 5 ½” x 8 ½” scored at 4 ¼”
- Basic Black: 3” x 5 ½”
- Whisper White: 2 ¾” x 5 ½”
Instructions:
- Fold Terracotta Tile card base and stamp outline flower in matching ink colour around edges.
- Stamp the second layer of flower on Whisper White cardstock randomly using Terracotta Tile ink.
- Stamp middle part of the flower using Memento Black ink. To get a lighter colour, stamp on scrap paper first before stamping in the flower.
- Stamp the greeting using Memento Black ink.
- Adhere Whisper White layer to Basic Black layer after stamping is complete.
- Cut a piece of Black Glittered ribbon (approx. 3 ½”) and adhere ends to back of Basic Black layer.
- Cut another piece of ribbon approximately the same size and tie in a knot around the first ribbon. Trim ends.
Product List
QUICK LINKS:
-
-
- WEEKLY NEWSLETTER & TUTORIALS: Sign up for my newsletter to get updates, specials & card ideas!
- JO JO POINTS: Earn free stamps with my VIP reward program!
- New to Stampin’ Up? Check out my STAMPING 101 TIPS here!
- CLEARANCE RACK: Save up to 60% on great products! They have some items in the clearance rack right now!!
-
The new 2019-2020 catalogue is live!
Magnolia Lane Happy Birthday
HAPPY NEW CATALOGUE DAY!!!
Make sure you check out my site today (past 2pm EST) to see all the new products! www.stampingjo.com/store
The new catalogue is chock-full of awesome new stamps & accessories and I’m so excited for the launch! Here is a fun project with some brand new products that don’t include any stamping!
The great thing about getting a Stampin’ Up! card pack is that it makes card making super easy and fast!

Instructions
- Cut down one of the card bases in the Memories & More Cards & Envelopes to 8 ½” x 5 ½”, fold to create card front.
- Glue one of the 4” x 3” Memories & More Cards to the left side of the card front.
- Cut out the sentiment from the Memories & More Card using the 3 ½” x 2 1/8” die from the Rectangle Framelits using a die cutting machine.
- Glue the rectangle on the front of the card centering it on the first card.
- Add some magnolia and leaves stickers from the Memories and More Cards to the top right corner of the rectangle.
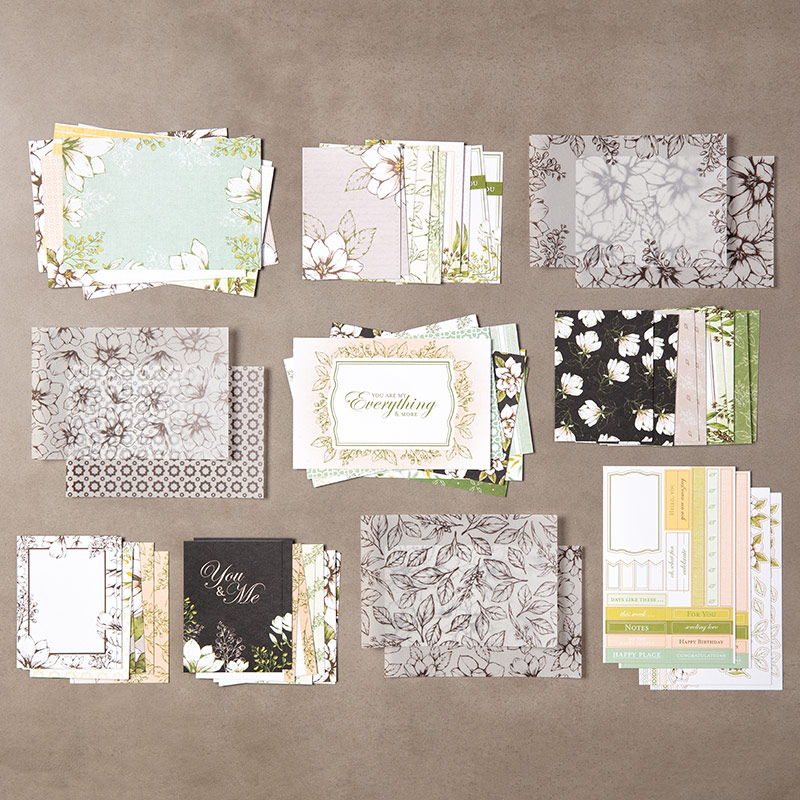
The Magnolia Lane Memories & More Card Pack features beautiful floral images.
* 50 total double-sided cards (2 each of 25 designs) in 3″ x 4″ and 4″ x 6″ sizes
* 6 4″ x 6″ single-sided printed vellum specialty cards
* 4 sticker sheets
* Acid free, lignin free
* Great for scrapbooking and cardmaking
Product colours: Basic Black, Early Espresso, Garden Green, Mint Macaron, Mossy Meadow, Petal Pink, So Saffron, Soft Sea Foam, Whisper White

Product List
QUICK LINKS:
-
-
- WEEKLY NEWSLETTER & TUTORIALS: Sign up for my newsletter to get updates, specials & card ideas!
- JO JO POINTS: Earn free stamps with my VIP reward program!
- New to Stampin’ Up? Check out my STAMPING 101 TIPS here!
- CLEARANCE RACK: Save up to 60% on great products! They have some items in the clearance rack right now!!
-


