Skip to content

Hand Stamped Cards with Josee Smuck-Stampin' Up! Canada Demonstrator

Stampin' Up! Canada Demonstrator; Rubber Stamps & Supplies for Cardmaking & Scrapbooking in Stittsville, Ontario (near Ottawa)

Menu
  • Home
  • JO JO POINTS
  • **Join**
  • Monthly Craft Kit
  • Weekly News
  • Shop Now
  • Contact Me
Menu

Author: Josee

Tasty Truck treat box instructions, Tasty Truck Treat Holder Instructions

Tasty Truck Treat Holder Instructions 2017 Sale-A-Bration Catalogue

Posted on January 24, 2017January 23, 2017 by Josee

Good Morning! I am so excited to share today's project with you- the Tasty Truck Treat Holder Instructions! Since the 2017 Sale-A-Bration Catalogue went live a few weeks ago I have had several requests for the instructions for the Tasty Truck Treat Holder (or Treat Box) shown in the Sale-A-Bration catalogue on page 12. After searching it out a few times online, I could not find anyone who had already put together instructions, so I got to work and came up with my own Tasty Truck Treat Holder Instructions to share with you!

If you are on Pinterest, make sure you PIN this one for later! Just hover ove the image below to get the Pinterest Save button!

Tasty Truck treat box instructions, Tasty Truck Treat Holder InstructionsThe Tasty Truck Stamp Set is one of the Sale-A-Bration freebies you can choose for FREE! with every $60 you spend in my Stampin Up store. Only until March 31st, 2017!

How To Make the Tasty Truck Treat Holder:

For the outside of the truck:

1. Start by stamping the Tasty Truck onto Whisper White Thick cardstock two times; allow to dry then watercolor with Aqua Painters and ink. I used Emerald Envy and Peekaboo Peach; I used a Basic Gray Stampin’ Write Marker to color the wheels; even though you won’t see much of one of the trucks, you will want to color it as you will see it a bit around the edges

2. Once that was dry, Clear Wink of Stella was added to the window frames, lights and accents

3. Cut out both trucks using Paper Snips.

4. Note: one of the trucks will have the stamped image facing inside the truck, you may choose to color behind the stamped image- alternatively if you wish to have a truck image facing out on both sides you could stamp the truck image on a Window Sheet and cut it out in the shape of the truck adhering it to the outside with clear glue. I chose not to do that.

5. If you want a see through window on your truck, you will need to use an Exacto Knife to cut out the windows. For the sake of being able to adhere the tabs on the inside box, I chose not to cut out the front driver window; if you choose to, you will need to trim the tabs further so they do not show through the window (see below- the truck on the left has the front window cut and you can see how little space there was for the side to be adhered)

Note, you shouldn't write your measurements on the cardstock like I did there. lol! Also, make sure you use mat or piece of cardboard on your surface when using the Exacto Knife!

6. Cut a piece of Window sheet about 2.75”x1.5” and adhere to the back to the cut out truck using Tear & Tape Adhesive; then trim the edge of the window sheet along the front of the truck using Paper Snips


For the Inside of the Truck:

1. Cut a strip of Whisper White Thick cardstock 5.5”x4” for a large box – this will give you a box that is 2” along the ‘front’ of the truck and 2.5” along the truck side; this allows for a loosely filled 3”x6” Cellophane Bag; if you would prefer it to be smaller to fit a 2”x8” cellophane bag without having too much extra space follow the instructions for the small box (I used a 2”x8” bag here but I cut the top of the bag a bit-as you can tell there is still room)

2. Using the Scoring Tool, score the box as shown below for the Large or Small Tasty Truck Treat Holder Instructions:


3. Fold the cardstock at all the score lines and use Paper Snips to cut the intersecting score lines, also trimming the inside corners of the ‘front’ of the truck (so that it does not show on the outside of the truck and allows you to lean the front of the box in to follow the shape of the truck front)

4. Add Tear & Tape Adhesive to the edges as shown below (this is what your final piece will look like!)

5. Trim along the blue lines as shown in the diagrams above if you have cut out a window

6. If you have cut a window, before peeling off the adhesive backing, make sure the tabs you have cut will not be seen through your window

7. Peel the adhesive from the Tear & Tape Adhesive strips and start by adhering the back of the box to the back edge of the truck trying not to leave much space as you don’t want too much sticking out the front of the truck; Adhere the back and bottom side

8. Note: for the ‘front’ of the truck you will be following the slanted edge of the truck shape so the front side will not be straight up; do this for both stamped truck pieces

9. Finally, you are ready to add your treats! Add whatever treats you like to a cellophane bag, add ribbon and a tag. Here I used the new Emerald Envy 1/8” Taffeta Ribbon and the Classic Label Punch to create a tag from Peekaboo Peach cardstock.

You can download the Tasty Truck Treat Holder Instructions to print at home!


Stampin Up Stamps Used for the Tasty Truck Treat Holder:

Tasty Truck Stamp Set (Sale-A-Bration)- 143300

Stampin Up Paper:

Whisper White Thick cardstock-140272, Peekaboo Peach cardstock-141417, Window Sheets-142314

Stampin Up Ink:

Basic Black-140931, Emerald Envy-141396, Peekaboo Peach-141398, Wink of Stella Clear- 141897, Basic Gray Marker for wheels

Other Papercrafting Supplies Used:

Required: Stampin’ Trimmer-126889, Simply Scored Scoring Tool-122334, Tear & Tape Adhesive-138995 , Paper Snips-103579

Optional: Classic Label Punch-141491, Aqua Painter-103954, Emerald Envy 1/8” Taffeta Ribbon-142742, White Baker’s Twine-124262, 1/16” Handheld Circle Punch- 134363, Cellophane Bags- 141704 (3”x6” for large box) or 141703 (2”x8” for small box)

Non Stampin Up: an Exacto Knife for cutting out the windows; plus candies/chocolate of your choice

I hope you give the Tasty Truck Treat Holder a try!! If you do, I'd love to see them! Feel free to share here in the comments or on my Facebook page!

Thanks for stopping by! Have a wonderful day!


blog-signature-spring

host-code

QUICK LINKS: 
2017 OCCASIONS CATALOGUE– NEW Spring Catty!! Check it out! Available January 4th to May 31st

SALE-A-BRATION– Choose a FREE Sale-A-Bration product with every $60 you spend before taxes and shipping! January 4th to March 31st!

CLEARANCE RACK– Save up to 60%  

JO JO POINTS– Earn free stamps with my Jo Jo Points Program    

Read more

My Crafty Friends Monday: Yummy In My Tummy for hand made Valentines and more!

Posted on January 23, 2017January 20, 2017 by Josee

My Crafty Friends Monday-NEW-SMIf you have been following my blog for awhile, you know that each Monday, I like to feature different projects that have inspired me and I know they'll inspire you too! This week we've got some great samples of hand made Valentines and more using the Yummy in My Tummy stamp set!

 
Each project was created by different & amazingly talented stampers- make sure you check out their blogs for more details and to check out their other amazing projects!!
(**Note…don't worry- I've contacted each of these stampers and allowed them to decline if they choose.) 
 

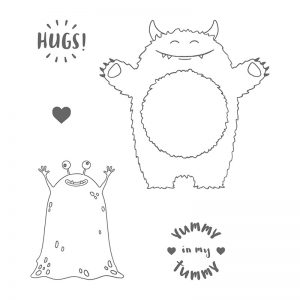
This week's featured stamp set is Yummy In My Tummy (142922 wood, 143623 clear mount).Yummy in My Tummy stamp set, Stampin Up, for hand made Valentines and more!

This stamp set also coordinates with the Layering Circles Framelits Dies (141705). This stamp set is perfect for kids cards, hand made Valentines, Love cards and cards Just Because 🙂

You are going to love this week's amazing finds! So many cute projects using this stamp set. Check them out…

A cute idea for a kids card

Dena Rekow: her blog

A great kids hand made card for Valentines or just because

Such a fun way to use the monsters in this stamp set and great coloring too! Peekaboo!


Hand made Valentines

Sacha van de Kerkhof : her blog

Hand made Valentines card

I think this is such a cute and fun way to use the Sealed With Love stamp set with this monster. Love it!


Debbie Henderson: her blog

A great idea for hand made Valentines card

I love the way the monster was used in the backgroun and stamped on the cardstock as a focal point- and those googly eyes? How fun!


Danny Hikade: her blog

Cute idea for hand made Valentines

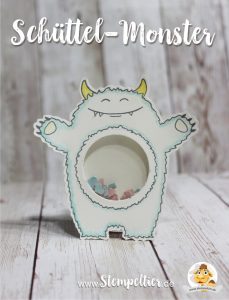
I have to say, I think this is the cutest shaker card ever! Love that she used heart punchouts from the Confetti Hearts Border Punch.


Vicki Burdick: her blog

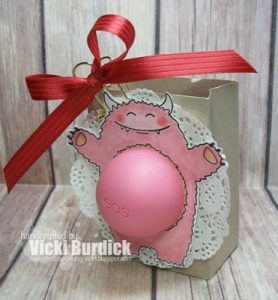
Hand made Valentines, gift or treat idea

Talk about amazing ideas! Love that the EOS lip balm fits right in the monster's belly. How stinkin' cute is that? What a fabulous Valentine gift idea!


Love these ideas? You can purchase this stamp set through my ONLINE STORE! 

I hope you've enjoyed this week's "My Crafty Friends Monday" Make sure you visit the talented artist's featured on this post! Thanks for stopping by today!

Were you featured here? Here's a badge you can add to your blog!
My Crafty Friends Monday-featured-NEW-SM


blog-signature-spring

host-code

QUICK LINKS: 
2017 OCCASIONS CATALOGUE– NEW Spring Catty!! Check it out! Available January 4th to May 31st

SALE-A-BRATION– Choose a FREE Sale-A-Bration product with every $60 you spend before taxes and shipping! January 4th to March 31st!

CLEARANCE RACK– Save up to 60%  

JO JO POINTS– Earn free stamps with my Jo Jo Points Program    

Read more

Urban Underground Suite- perfect for masculine cards

Posted on January 20, 2017January 19, 2017 by Josee

Hello! Happy Friday!

I hope you have some great plans for this weekend! I hope that includes some stamping time?!

There is still so much more to show you from the new Stampin Up 2017 Occasions Catalogue, so I thought I would show you the new Urban Underground Suite. This new suite features masculine images, colors and textures that are perfect for Father's Day cards and birthday cards for your favorite guy.

Urban Underground Suite, Stampin Up, 2017 Occasions Catalogue

The color scheme of this suite features: Basic Black, Basic Gray, Delightful Dijon, Very Vanilla and silver accents.

The Urban District stamp set is the perfect set for Father's Day cards for Dad. I could see this as some framed home decor too- maybe for dad's office or work shop? This stamp set coordinates with the Build It Framelits Dies.

Urban Underground Designer Washi Tape-142787, Stampin Up, 2017 Occasions CatalogueUrban Underground Embellishments-142786, Stampin Up, 2017 Occasions Catalogue

The suite also features the Urban Underground Designer Washi Tape and these fabulous Urban Underground Embellishements. Love the screws and nuts!

Urban Underground cardstock pack-142784, Stampin Up, 2017 Occasions catalogueUrban Underground Specialty Designer Series Paper-142783, Stampin Up, 2017 Occasions Catalogue

The suite of course includes a coordinating cardstock pack in Basic Gray, Delightful Dijon and Very Vanilla and the Urban Underground Specialty Designer Series Paper in the same colors, plus Basic Black and silver with some masculine patterns.

Hexagon Dynamic Textured Impressions Embossing Folder-143231, Stampin Up, 2017 Occasions Catalogue

I think you will love the new Hexagons Dynamic Textured Impressions Embossing Folder because it not only adds amazing texture to masculine cards, but to any card for any occasion!  These Dynamic folders are meant to create deep impressions in your cardstock and work best if you lightly mist your cardstock with a little water before embossing it.

There is another new stamp set that is a perfect addition to the suite of products: the Nailed It stamp set!  It coordinates with the Build It Framelits Dies allowing you to cut out some of the fun images like shown above in that super cute tool belt!

Although this stamp set has what many would consider masculine images, the sentiments lend themselves to creating more than just 'masculine' cards. Of course, if you have a handy woman in your life, this set is perfect for her too!

Well, that is it for the Urban Underground Suite. Is this a suite of products you can see yourself stamping with?

Have yourself a wonderful weekend!


blog-signature-spring

host-code

QUICK LINKS: 
2017 OCCASIONS CATALOGUE– NEW Spring Catty!! Check it out! Available January 4th to May 31st

SALE-A-BRATION– Choose a FREE Sale-A-Bration product with every $60 you spend before taxes and shipping! January 4th to March 31st!

CLEARANCE RACK– Save up to 60%  

JO JO POINTS– Earn free stamps with my Jo Jo Points Program    

Read more
quick tip, create a banner using your Big Shot and the Banner Framelits, Stampin Up, Details at: www.stampingjo.com

Falling In Love Banner

Posted on January 19, 2017January 16, 2017 by Josee

quick tip, create a banner using your Big Shot and the Banner Framelits, Stampin Up, Details at: www.stampingjo.comHello!

Today's project I have to show you is one of the projects shared in a group of great demonstrators I am a part of. This group is kind of a privilege of being a Stampin Up demonstrator with a leader title. Each month we share projects with each other so that we have more amazing projects to show YOU! What I do love about the projects in this share group is that we can't always buy EVERY stamp set in the catalogue (as much as we may really WANT to buy it all!) so it's a great way to show you samples of cards and other projects, like this one, even when I may not have all the products to use myself! Often seeing amazing projects makes me WANT to get the stamps, accessories or tools even more! But, the best part really is that being a Stampin Up demonstrator is really being a part of a wonderful community of amazing people sharing amazing ideas! THAT feels pretty good!

All this to say, there actually were no stamps used in the making of this project! laughSo, check it out…

falling in love banner, valentine banner, anniversary banner, Stampin Up

How To Make It:

1. Using the largest Banner Framelit, cut two from each of the following colors of card stock: Sweet Sugarplum, Soft Sky and Sahara Sand.

2. Using the Banner Framelit one size smaller, cut 6 pieces from the Falling in Love Designer Series Paper. Adhere onto the large banner pieces (if you want to wrap ribbon around the designer paper like the letter “V” above, be sure to add the ribbon piece before adhering).

3. Using the 2” circle punch, punch out 6 circles from the Vellum cardstock. These pieces will go behind each letter. Set aside.

4. Cut out the letters “L”, “O”, “V” and “E” using the Large Letters Framelits from Sweet Sugarplum cardstock. Adhere the letters to the vellum circles using Stampin’ Dimensionals.

5. Adhere the circles (with the letters attached) to the banner pieces. Adhesive can be strategically placed behind each letter so it won’t show through the vellum.

6. Cut two butterflies from the Butterflies Framelits; one in Sweet Sugarplum and one in Sahara Sand. Adhere these to two Doilies and then adhere to the banner piece. Add 3 to 5 Pearls Basics in the center of each butterfly. This creates the two end banner pieces.

7. Tie the Vanilla Satin ribbon in a bow and adhere to the “L” banner piece using Glue Dots.

8. Punch one butterfly from the Elegant Butterfly punch in Sahara Sand. Punch one butterfly using the Bitty Butterfly punch from Sweet Sugarplum. Adhere the small butterfly to the large butterfly using glue dots. Adhere in the lower, right-hand side to the letter “V”. Add three Soft Sky enamel shapes to the letter “V” as well.

9. Adhere one of the Falling in Love Embellishments to the letter “E” using Glue Dots. Continue embellishing pieces as desired.

10. Add all the banner pieces to the Sweet Sugarplum Ruched Ribbon using the small clothespins or try it out with the Gold Binder Clips (available on page 177 of the Stampin Up Annual Catalogue)

Paper:

Falling in Love Designer Paper (142788), Sweet Sugarplum card stock (141418), Soft Sky card stock (131203), Sahara Sand card stock 121043), Vellum card stock (101856)

Other:

Banners Framelits (132173), Large Letters Framelits (141712), 2” Circle Punch (133782), Butterflies Thinlits (137360), Very Vanilla ¼” Satin Ribbon (142794), 3/8” Sweet Sugarplum Ruched Ribbon (141428), Elegant Butterfly punch (127526), Bitty Butterfly punch (129406), Delicate White Doilies (141701), Pearl Basic Jewels (119247), Falling in Love Embellishments (142791), Subtles Enamel Shapes (141679), Big Shot Die Cutting Machine (143263), Stampin’ Dimensionals (104430), Mini Glue Dots (103683), Small Clothespins (found at a local store)


I hope you enjoyed today's project and are inspired to make your own banner!


blog-signature-spring

host-code

QUICK LINKS: 
2017 OCCASIONS CATALOGUE– NEW Spring Catty!! Check it out! Available January 4th to May 31st

SALE-A-BRATION– Choose a FREE Sale-A-Bration product with every $60 you spend before taxes and shipping! January 4th to March 31st!

CLEARANCE RACK– Save up to 60%  

JO JO POINTS– Earn free stamps with my Jo Jo Points Program    

Read more
Sealed With Love, Stampin Up, Valentine card

Sealed With Love Valentine Card

Posted on January 18, 2017January 18, 2017 by Josee

Good Morning!

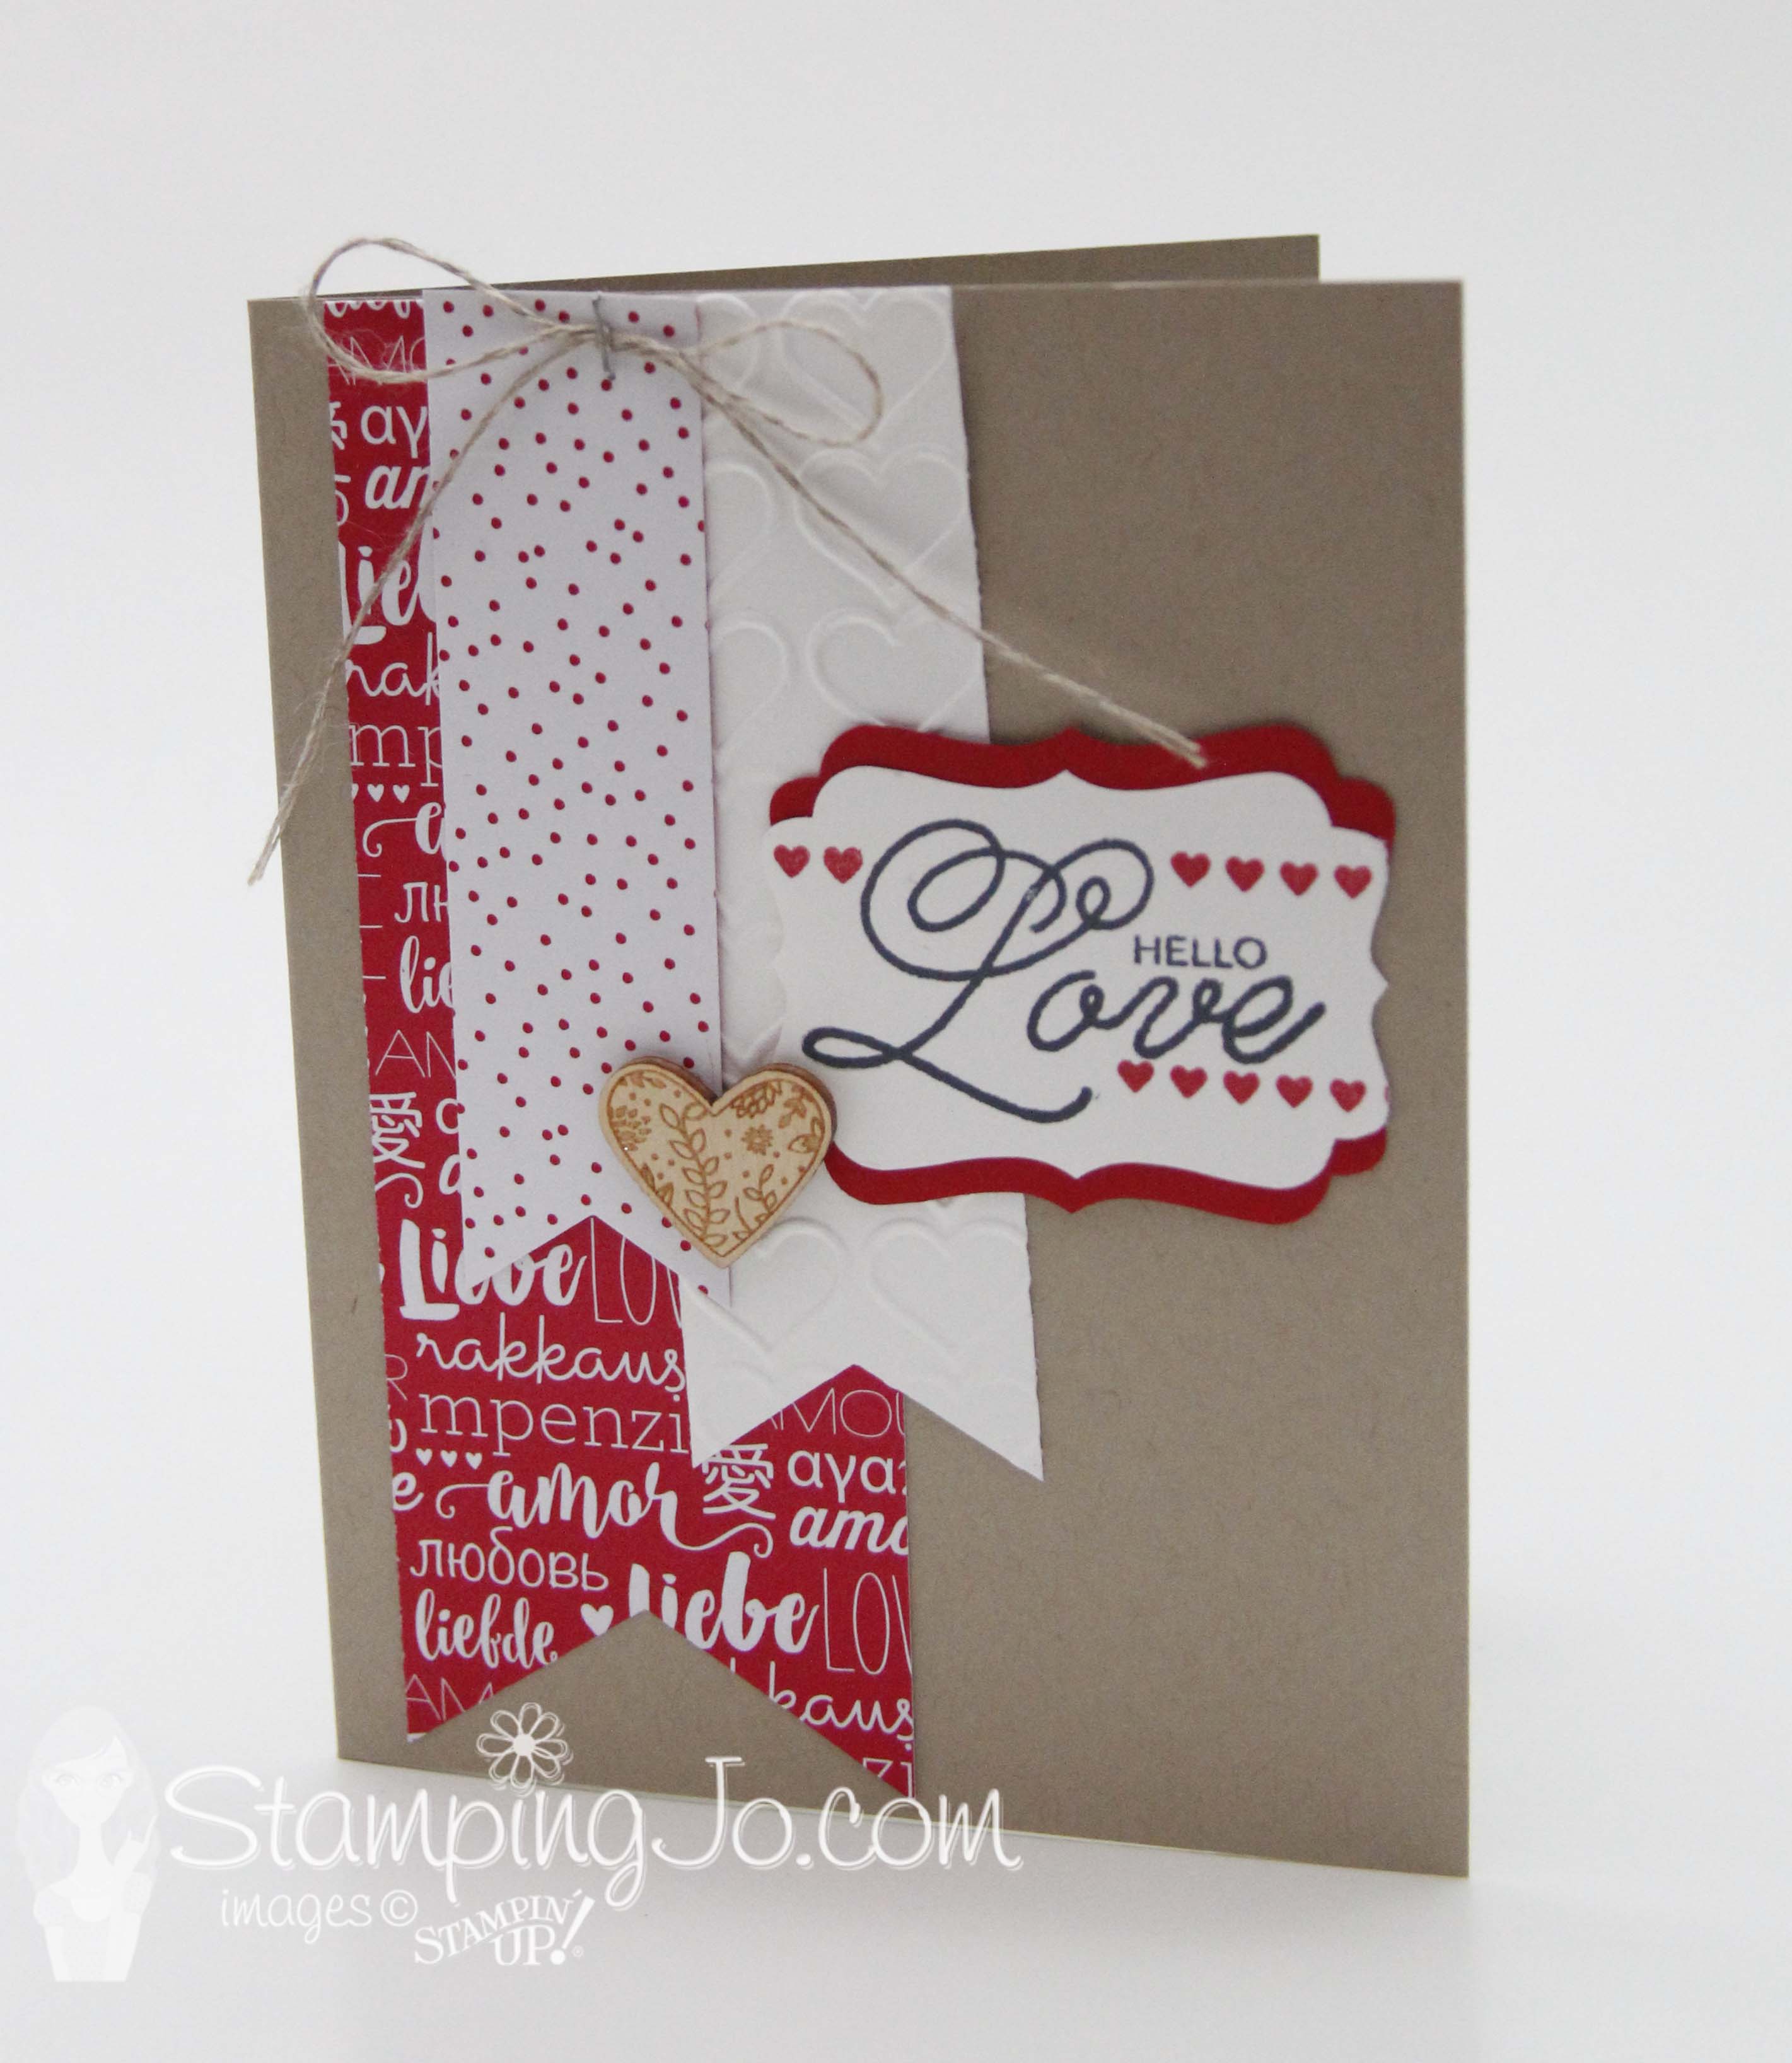
I am back today with another Valentine card to show you using the new Sealed With Love stamp set from the 2017 Occasions Catalogue. I love the look of the Real Red and Whisper White with the Crumb Cake and wood elements. 

Sealed With Love, Stampin Up, Valentine card

How To Make It:

This Valentine card starts with a cardbase of Crumb Cake cardstock.

Then take the Sending Love Designer Series Paper Stack and cut two strips: one about 1" wide, the other about 2" wide and punch the ends using the Banner Triple Punch.

Cut one strip of Whisper White cardstock about 1 1/2" wide and punch the end of that one with the Banner Triple Punch and then run it through the Big Shot in the Happy Heart Textured Impressions Embossing Folder.

Take all three banner strips and a piece of Linen Thread and staple them to the card front (as shown) using the Handheld Stapler. You can add a bit of SNAIL Adhesive to the back of the strips if you prefer them to be stuck down.

On a scrap piece of Whisper White cardstock, stamp the sentiment from Sealed With Love with Tuxedo Black Ink and then stamp the hearts using Real Red ink. Punch it out using the Decorative Label Punch.

Punch a piece of Real Red cardstock using the Decorative Label Punch and then cut it in half horizontally. This will allow you to adhere the punch out as a mat to the sentiment layer. Adhere it to the back of the Whisper White punch out using Mini Glue Dots or SNAIL Adhesive.

Sealed With Love, Stampin Up, 2017 Occasions Catalogue, Valentine card

Adhere the matted sentiment layer to the cardfront using Stampin' Dimensionals.

Add a Mini Glue Dot to the back of the wooden heart element from the Sending Love Embellishment pack and add that to the card front.

Stamps:

Sealed With Love-142815 (photopolymer)

Paper:

Sending Love Designer Series Paper Stack-142733, Crumb Cake-120953 , Whisper White-100730 , Real Red-102482

Ink:

Memento Tuxedo Black- 132708, Refill-133456, Real Red-126949

Other:

Banner Triple Punch-138292, Decorative Label Punch- 120907, Sending Love Embellishments-142735, Happy Heart Textured Impressions Embossing Folder-137364 , Linen Thread-104199, Mini Glue Dots- 103683, SNAIL Adhesive- 104332, Refill- 104331, Stampin’ Dimensionals- 104430, Handheld Stapler-139083 (Refill: Mini Staples-135847)

I hope you enjoyed today's card and are inspired to start making some Valentine's 🙂 Don't forget, with every $60 you spend (before taxes and shipping) in my Stampin Up store, you get to choose one FREE Sale-A-Bration freebie!

Happy Stamping!


blog-signature-spring

host-code

QUICK LINKS: 
2017 OCCASIONS CATALOGUE– NEW Spring Catty!! Check it out! Available January 4th to May 31st

SALE-A-BRATION– Choose a FREE Sale-A-Bration product with every $60 you spend before taxes and shipping! January 4th to March 31st!

CLEARANCE RACK– Save up to 60%  

JO JO POINTS– Earn free stamps with my Jo Jo Points Program    

Read more

Posts pagination

  • Previous
  • 1
  • …
  • 215
  • 216
  • 217
  • 218
  • 219
  • 220
  • 221
  • …
  • 587
  • Next

go to store

Promos

Paper Bouquet Kit

josee smuck

Josée Smuck

Stampin’ Up! Canada Demonstrator since 2002
Ottawa, ON, Canada
Contact me with questions!
Josee@StampingJo.com
(613) 831-2917

Current Catalogues

Annual Catalogue (May2024-April2025)Stampin' Up! Annual CatalogueView Catalogue-ENG | Shop Online
View Catalogue- FR

——————

Looking for something?

Get the news


Click HERE to download Jo-Jo’s FREE Sketches & Tips Guide

Updates

Receive NEXT-DAY updates by email:

Receive SAME DAY updates by subscribing in a reader:
Click to Subscribe in a reader

Recent Posts

  • Embrace the Journey April 11, 2025
  • For the Books April 8, 2025
  • Beautiful Birthday April 5, 2025
  • Happy Retirement April 2, 2025
  • Frame & Flowers March 28, 2025

Categories

Proud Member…

Inky_Divas800

The content of this blog is the sole responsibility of Josee Smuck as a Stampin’ Up! Independent Demonstrator.  The use of and content of classes, services or products offered is not endorsed by Stampin’ Up! Unless otherwise indicated, images © Stampin’ Up! 1990 – present.

© 2025 Hand Stamped Cards with Josee Smuck-Stampin' Up! Canada Demonstrator | Powered by Superbs Personal Blog theme