Skip to content

Hand Stamped Cards with Josee Smuck-Stampin' Up! Canada Demonstrator

Stampin' Up! Canada Demonstrator; Rubber Stamps & Supplies for Cardmaking & Scrapbooking in Stittsville, Ontario (near Ottawa)

Menu
  • Home
  • JO JO POINTS
  • **Join**
  • Monthly Craft Kit
  • Weekly News
  • Shop Now
  • Contact Me
Menu
Layering Love stamp set, Stampin' Up, double z card,stamped card

Layering Love stamp set: Double Z Fold Card

Posted on April 26, 2017April 24, 2017 by Josee

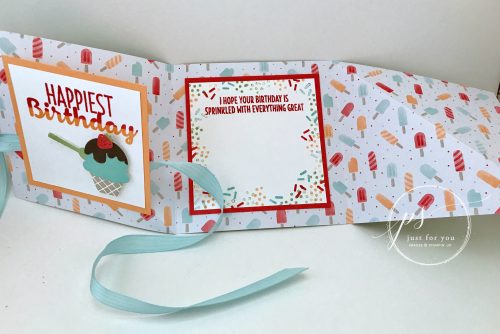
If you are looking to make something a little different, give this fun Double Z Fold card a try. This card uses some soon to be retired products: the Fruit Stand Designer Series Paper, the Tin of Cards stamp set and the Real Red Stitched Satin Ribbon! So make sure to check them out in store before they are gone for good!

Layering Love stamp set, Stampin Up, double z fold card, stamped card


How To Make This Double Z Fold Card:

Start by stamping the LIVE LAUGH LOVE greeting from the Layering Love stamp set in Tuxedo Black ink on a scrap piece of Whisper White cardstock.

Die cut the greeting with the heart framelit from the Sweet & Sassy Framelits. Die cut the heart the next size larger from Old Olive cardstock to create a mat layer. Adhere the stamped heart to the Old Olive die cut.

Tie a bow with the Real Red 3/8” Stitched Satin Ribbon (soon to retire!) – adhere with a Mini Glue Dot.

To create the main card base:

Cut, score and fold on the score lines of the Real Red cardstock (11" x 4-1/4", scored at 2-3/4" & 5-1/2").

Adhere the 4" x 5-1/4" Whisper White cardstock to the Real Red card base.

Next, adhere the strawberry Fruit Stand Designer Series Paper 2-3/8" x 3-7/8" layer to the Old Olive 2-1/2" x 4" layer and then to card front.

To create the smaller Z fold strip:

Adhere the striped Fruit Stand Designer Series Paper layer to the Old Olive strip – bending on score lines (scored at 2-3/4 & 5-1/2") as you glue them together

Tip: make sure you are gluing from the left to the right as you adhere the Designer Series Paper strip or it will not fit properly due to the score line folding.

Adhere the left side to the folded back front panel and the right side (shown below with the two strawberries) to the inside layer.

Layering Love stamp set, Stampin' Up, double z fold card,stamped card

Stamp 'HAPPY BIRTHDAY' from the Tin of Cards stamp set in Tuxedo Black ink on the inside Whisper White layer.

Adhere the die cut heart to front strip as shown on the card above. Then, cut out three strawberries from the Designer Series Paper and adhere along the smaller Z strip as shown.

Measurements:

· Real Red 11" x 4-1/4", scored at 2-3/4 & 5-1/2"

· Whisper White 4" x 5-1/4" & scrap

· Old Olive 2-1/2" x 4" & 1-1/2" x 11", scored at 2-3/4 & 5-1/2" plus scrap piece for die cutting

· Fruit Stand Designer Series Paper (strawberry pattern) 2-3/8" x 3-7/8" & (striped pattern) 1-3/8" x 10-7/8", scored at 2-3/4 & 5-1/2", plus strawberry pattern scraps for cutting strawberries out

Stampin' Up Stamps:

Layering Love (141962-Wood, 141965-Clear); Tin of Cards (138946) Retiring Product

Stampin' Up Paper:

Whisper White (100730), Real Red (102482), Old Olive (100702), Fruit Stand Designer Series Paper (141660) Retiring Product

Stampin' Up Ink:

Tuxedo Black Memento (132708)

Other Stamp Supplies and Tools:

Stampin’ Trimmer (126889), Real Red 3/8” Stitched Satin Ribbon (141693) Retiring Product, Sweet & Sassy Framelits Dies (141707), Big Shot (143263), Glue Dots (103683), Liquid Multipurpose Glue (110755)

I hope you give today's Double Z Fold card a try!


QUICK LINKS: 
2017 OCCASIONS CATALOGUE– Available January 4th to May 31st

RETIRING LIST– These items are only available while supplies last!

CLEARANCE RACK– Save up to 60%  

JO JO POINTS– Earn free stamps with my Jo Jo Points Program    

NEW to STAMPIN' UP? Check out my tips here.

Read more

Quick and Easy No Layer Card: Happy Celebrations Stamp Set

Posted on April 25, 2017April 24, 2017 by Josee

Today's card is a simple, stamped celebration card using the Happy Celebrations stamp set from Stampin' Up's 2017 Occasions Catalogue. This card uses only one sheet of cardstock- no layers! Perfect for a quick and easy card!


How To Make This Hand Stamped Celebration Card:

Start this card with a base of Whisper White Thick cardstock. Use the Envelope Punch Board to round the corners on the cardbase.

Run the card front through the Big Shot with the 'Celebrate' Celebrations Duo Textured Impressions Embossing Folder.

Stamp the shape stamps from the Happy Celebrations stamp set in Crushed Curry, Tempting Turquoise and Dapper Denim ink over top the debossed 'Celebrate'.

Stamp the paint splotch over the word with White Craft Ink and then add some White Embossing Powder and heat set with the Heat Tool.

Take a Basic Gray Stampin' Write marker and follow the lines of the debossed word to emphasize the wording a bit more.

Stampin' Up Stamps:

Happy Celebrations stamp set-143012 Photopolymer

Stampin' Up Paper:

Whisper White Thick-140272

Stampin' Up Ink:

Dapper Denim-141394, Crushed Curry-131173, Tempting Turquoise-126952, White Craft Stampin' Ink-101731, Wink of Stella Clear-141897, Basic Gray Stampin' Write Marker-131261 (Neutrals Collection)

Other Stamp Supplies and Tools:

Celebrations Duo Textured Impressions Embossing Folder-142760,White Embossing Powder-109132, Heat Tool-129053, Envelope Punch Board (for rounding the corners)-133774

Thanks for stopping by! I hope you enjoyed today's hand stamped celebration card using the Happy Celebrations stamp set!


QUICK LINKS: 
RETIRING LIST– These items are only available while supplies last!

CLEARANCE RACK– Save up to 60%  

JO JO POINTS– Earn free stamps with my Jo Jo Points Program    

NEW to STAMPIN' UP? Check out my tips here.

Read more

More Retiring Products!

Posted on April 24, 2017April 21, 2017 by Josee

I hope you had a great weekend! Instead of the regular My Crafty Friends Monday post today, I thought I would show you more examples of the stamp sets and products that will be retiring May 31st (or while supplies last!) as part of Stampin' Up's Retiring Products List!

Great for Christmas and Winter Cards

I am sad to see this one go! This Snow Place stamp set is an adorable option for Christmas cards and winter related cards and scrapbook pages. The Snow Friends Framelits will also be going! You can get the full details for this card here.


The Embellished Ornaments is a lovely, more sophisticated option for Christmas cards. Of course the matching Delicate Ornaments Thinlits are also being discontinued 🙁  You can find all the details for this card here.


This cute stamp set- the Over the Rainbow stamp set is perfect for messages of hope. You can get the details for this card here.


The Moroccan Nights stamp set has some lovely lantern and medallion images. You can see this card here.


The Crazy About You stamp set and the Hello You Thinlits used on this card are being discontinued as well! You can get the details for this card here.


This is an oldie, but one of my favorite stamp sets! Papillon Potpourri has been around for awhile, but it won't be around for much longer! You can get the details on this card here.

There are lots more products on the retiring product list! Make sure to check out products in my online store here. Make sure you shop early for the best selection, as these products are only available while supplies last!! 

Have a great day!


QUICK LINKS: 
NEW ANNUAL CATALOGUE COMING SOON! Reserve yours here.

CLEARANCE RACK– Save up to 60%  

JO JO POINTS– Earn free stamps with my Jo Jo Points Program    

NEW to STAMPIN' UP? Check out my tips here.

Read more

Happy Celebrations stamp set: Celebrate Card

Posted on April 21, 2017April 20, 2017 by Josee

Happy Friday! I've got a simple stamped card to show you today using the Happy Celebrations stamp set and matching Celebrations Duo Textured Impressions Embossing Folder. This card comes together quickly and would be great if you need a few cards to keep on hand for some upcoming birthdays.

Happy Celebrations stamp set, Celebration Duo TIEF, Stampin Up, birthday card, celebrate stamped card

How To Make This Stamped Celebrate Card:

This card really is so simple to make! Start with a base of Cucumber Crush cardstock (one of the In-Colors retiring soon!).

Then run a layer of Whisper White cardstock through the Big Shot in the 'Celebrate' Celebrations Duo Textured Impressions Embossing Folder.

Use Peekaboo Peach ink and the paint splotch stamp from the Happy Celebrations stamp set to add ink over the debossed 'Celebrate'.

Round the corners of the Whisper White layer with the Project Life Corner Punch and adhere this layer to the card base. (Or you can use the Envelope Punch Board to round corners too!)

Cut a piece of Cucumber Crush Striped Ribbon (also on the Retiring Product List!) and add to the cardfront using Mini Glue Dots.

As a final touch, add a Falling In Love Embellishments (retiring soon too!) with a Mini Glue Dot.

Stampin' Up Stamps:

Happy Celebrations stamp set-143012 Photopolymer

Stampin' Up Paper:

Cucumber Crush cardstock- 138333

Stampin' Up Ink:

Peekaboo Peach ink-141398

Other Stamp Supplies and Tools:

Celebrations Duo Textured Impressions Embossing Folder-142760, Cucumber Crush Striped Ribbon-141429, Falling In Love Embellishments-142791, Project Life Corner Punch- 135346, Mini Glue Dots- 103683

Have yourself a great weekend! I hope you enjoyed today's card using the Happy Celebrations stamp set!


QUICK LINKS: 
2017 OCCASIONS CATALOGUE– Available January 4th to May 31st

RETIRING LIST– These items are only available while supplies last!

CLEARANCE RACK– Save up to 60%  

JO JO POINTS– Earn free stamps with my Jo Jo Points Program    

NEW to STAMPIN' UP? Check out my tips here.

Read more
Cool Treats stamp set, Stampin Up, stamped birthday card, diagonal fold card

Cool Treats stamp set: Diagonal Fold Card

Posted on April 20, 2017April 20, 2017 by Josee

Today's card is a stamped birthday card idea with a fun diagonal fold. It uses the Cool Treats stamp set and Tasty Treats Designer Series Paper from Stampin' Up's 2017 Occasions Catalogue.

Cool Treats stamp set, Stampin Up, stamped birthday card, diagonal fold card


How To Make This Diagonal Fold Birthday Card:

Cut the Tasty Treats Designer Series Paper to 12” x 4” , then score at 4” and 8”, then diagonally on each end in the same direction.

Cool Treats stamp set, Stampin Up, stamped birthday card, diagonal fold card

For the card front:

On a Whisper White cardstock, stamp the waffle cone from the Cool Treats stamp set in Crumb Cake ink. Then stamp the ice-cream scoop in Pool Party ink with a Chocolate Chip ink drip over the top. Use the Pear Pizzazz ink to stamp the spoon and Watermelon Wonder ink for the strawberry with Pear Pizzazz ink for the leaves on top of the strawberry.

Cut out all the stamped pieces with the matching Frozen Treats Framelits dies and the Big Shot. Cut off the bottom of the waffle cone with scissors to create a waffle bowl.

Ink up “Happiest Birthday” from the Cool Treats stamp set in Peekaboo Peach ink, then along the top add Watermelon Wonder ink to create an ombre effect. Stamp at top of the 2-3/4” Whisper White square.

Layer the stamped piece on top of a 3" Peekaboo Peach cardstock square.

Assemble waffle ice cream bowl on birthday square using Stampin' Dimensionals. Set this front piece aside until the last step!

For inside the card:

Stamp “I hope your birthday…" from the Cool Treats stamp set in Watermelon Wonder ink at the top of a 3” Whisper White square and then stamp the sprinkles in the other colors around the edges of the square as shown.

Layer the stamped layer on a 3 1/4" square of Watermelon Wonder cardstock, then adhere to the center square of the Tasty Treats Designer Series Paper.

To finish off the card:

Fold both outside triangle edges of the Designer Series Paper backwards, then fold both sides in, covering the inside stamped sentiment.

Cut about 18" of Pool Party Stitched Ribbon and wrap it around the folded card and tie in a bow on the side opposite the ice cream on your Peeakaboo Peach layer. Lay a strip of Tear & Tape Adhesive across the flat front of the ribbon.

Apply adhesive only on one BACK CORNER of the stamped Peekaboo Peach Birthday layer you created in the first steps. This should be the same as the corner that will open to the left side of card (see image above) This corner will also be adhered to the Tear & Tape Adhesive on the ribbon! Adhere to front of card as shown.

Stampin' Up Stamps:

Cool Treats stamp set (142982 Photopolymer)

Stampin' Up Paper:

Tasty Treats Designer Series Paper (142770); Watermelon Wonder (138334); Peekaboo Peach (141417); Whisper White (100730)

Stampin' Up Ink:

Watermelon Wonder (138323); Peekaboo Peach (141398); Pool Party (126982); Pear Pizzazz (131180); Crumb Cake (126975); Chocolate Chip (126979)

Other Stamp Supplies and Tools:

Pool Party Stitched Satin Ribbon (141961); Frozen Treats Framelits Dies (142756); Stampin' Dimensionals (104430); Big Shot (143263); Stampin’ Trimmer (126889); Tear & Tape Adhesive (138995)

I hope you give this diagonal fold birthday card a try!


QUICK LINKS: 
2017 OCCASIONS CATALOGUE– Available January 4th to May 31st

RETIRING LIST– These items are only available while supplies last!

CLEARANCE RACK– Save up to 60%  

JO JO POINTS– Earn free stamps with my Jo Jo Points Program    

NEW to STAMPIN' UP? Check out my tips here.

Read more

Posts pagination

  • Previous
  • 1
  • …
  • 202
  • 203
  • 204
  • 205
  • 206
  • 207
  • 208
  • …
  • 587
  • Next

go to store

Promos

Paper Bouquet Kit

josee smuck

Josée Smuck

Stampin’ Up! Canada Demonstrator since 2002
Ottawa, ON, Canada
Contact me with questions!
Josee@StampingJo.com
(613) 831-2917

Current Catalogues

Annual Catalogue (May2024-April2025)Stampin' Up! Annual CatalogueView Catalogue-ENG | Shop Online
View Catalogue- FR

——————

Looking for something?

Get the news


Click HERE to download Jo-Jo’s FREE Sketches & Tips Guide

Updates

Receive NEXT-DAY updates by email:

Receive SAME DAY updates by subscribing in a reader:
Click to Subscribe in a reader

Recent Posts

  • Embrace the Journey April 11, 2025
  • For the Books April 8, 2025
  • Beautiful Birthday April 5, 2025
  • Happy Retirement April 2, 2025
  • Frame & Flowers March 28, 2025

Categories

Proud Member…

Inky_Divas800

The content of this blog is the sole responsibility of Josee Smuck as a Stampin’ Up! Independent Demonstrator.  The use of and content of classes, services or products offered is not endorsed by Stampin’ Up! Unless otherwise indicated, images © Stampin’ Up! 1990 – present.

© 2025 Hand Stamped Cards with Josee Smuck-Stampin' Up! Canada Demonstrator | Powered by Superbs Personal Blog theme