Skip to content
Hand Stamped Cards with Josee Smuck-Stampin' Up! Canada Demonstrator
Menu
  • Home
  • JO JO POINTS
  • **Join**
  • Monthly Craft Kit
  • Weekly News
  • Shop Now
  • Contact Me
Menu

Blog

Christmas Pines Quick & Easy Christmas Card

Posted on November 15, 2016November 14, 2016 by Josee

Good Morning! 

Today's card is a quick and easy Christmas card that could be the perfect card if you are looking to make several of the same style for your Christmas card mailing list! 🙂 The Christmas Pines stamp set and Emerald Envy Ombre Stampin' ink pad make giving this card dimension so simple.

christmas-pines-simple-card-by-stampingjo

How To Make It: 

Cut and score the Whisper White Thick cardstock for the cardbase

Cut the Real Red and Whisper White layers and punch the corners of each layer with the Project Life Corner Punch

On the Whisper White layer, use the Emerald Envy Ombre Stampin Pad to stamp the pine boughs at the top corner

Use the Real Red ink to stamp the sentiment in the bottom corner

Adhere the Whisper White and Real Red layers to the cardbase using SNAIL Adhesive

Die cut the small bow from the Pretty Pines Thinlits Dies and adhere to the top of the stamped boughs using Mini Glue Dots christmas-pines-simple-card-close-up-by-stampingjo

Add a Pearls Basics Jewel to finish off the card

Stamps: 

Christmas Pines- 142049

Paper: 

Whisper White -100730, Whisper White Thick Cardstock-140272, Real Red cardstock- 102482

Ink:

Real Red ink- 126949, Emeral Envy Ombre Stampin’ Pad- 141845

Other: 

Mini Glue Dots- 103683, SNAIL Adhesive- 104332, Refill- 104331; Pearls Basic Jewels- 119247, Pretty Pines Thinlits Dies- 141851, Project Life Corner Punch- 135346

I hope you have a wonderful day! 


blog-signature-holidayQUICK LINKS: 
1. 25% OFF SELECTED STAMPS – Until Nov. 30th
2. HOLIDAY CATALOGUE – Sept. 1 to Jan. 3
3. CLEARANCE RACK– Save up to 60%
4. JO JO POINTS– Earn free stamps with my Jo Jo Points Program


Read more

My Crafty Friends Monday: Candy Cane Christmas

Posted on November 14, 2016November 10, 2016 by Josee

Welcome to "My Crafty Friends Monday!" 

My Crafty Friends Monday-NEW-SMI hope you enjoyed a great weekend!!
 
Each Monday, I like to feature different projects that have inspired me and I know they'll inspire you too!
 
Each project was created by different & amazingly talented stampers- make sure you check out their blogs for more details and to check out their other amazing projects!!
(**Note…don't worry- I've contacted each of these stampers and allowed them to decline if they choose.) 
candy-cane-christmas-stampin-up

This week's featured stamp set is one of the Candy Cane Christmas (142037 wood, 142040 clear mount), which coordinates with the 3/4" Circle Punch (119873) as well as a whole suite of products designed to work wonderfully together:

Candy Cane Lane Deisgner Series Paper (141981)

Candy Cane Lane Baker's Twine (141983)

Real Red 3/4" Stitched Edge Ribbon (141984)

Candy Cane Lane Designer Washi Tape (141985)


Connie Babbert: blog

candy-cane-christmas-by-connie-babbert

Such a cute card with the cluster of Candy Cane Christmas images and the Candy Cane Lane Designer Series Paper.


Caroline Van Der Straaten: blog

candy-cane-lane-project-3-by-caroline

A great set that would be perfect as a gift or just to stay organized! Of course the tags and cards themselves look amazing!


Laura Mackie: blog

candy-cane-christmas-by-laura-mackie

Such a cute card- love the addition of the gingerbread man from Cookie Cutter Christmas!


Eveline van Heijst: blog

candy-cane-christmas-by-evaline

Love the simplicity of this set of cards- would be the perfect card if you have a huge stack to create for your mailing list 🙂


Chris Slogar: blog

candy-cane-christmas-by-chris-slogar

Love this pocket card made with the stamp set and Candy Cane Lane Designer Series Paper and Cookie Cutter Christmas gingerbread man.


Audra Monk: blog

candy-cane-christmas-sweets-by-audra-monk

Love this one with the Candy Cane Lane Designer Washi Tape! 


Love these ideas? You can purchase this stamp set through my ONLINE STORE! 

I hope you've enjoyed this week's "My Crafty Friends Monday" Make sure you visit the talented artist's featured on this post! Thanks for stopping by today!

Were you featured here? Here's a badge you can add to your blog!
My Crafty Friends Monday-featured-NEW-SM


blog-signature-holiday

QUICK LINKS: 
1. 25% OFF SELECTED STAMPS – Until Nov. 30th
2. HOLIDAY CATALOGUE – Sept. 1 to Jan. 3
3. CLEARANCE RACK– Save up to 60%
4. JO JO POINTS– Earn free stamps with my Jo Jo Points Program    

Read more
My Hero, Stampin Up, masculine hand stamped card

My Hero Masculine Card

Posted on November 11, 2016November 10, 2016 by Josee

Hello! 

color-21642_640
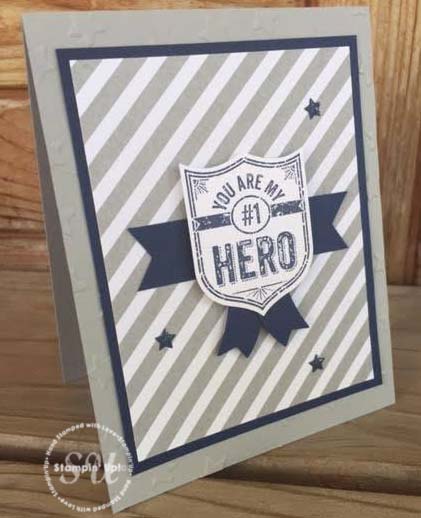
It's Remembrance Day today, always a bit of a sombre day as we remember all those who have fought to keep our country free. So grateful to live in this country 🙂 

Today's card felt like an appropriate card for today- of course it could be for anyone who fits the bill, perhaps even a Father's Day card. This card features the My Hero stamp set– on page 209 of the Stampin' Up 2016-2017 Annual Catalogue. Not only is this stamp set full of versatile stamps for various occasions and coordinates with several framelits die sets, the purchase of this stamp set helps support Ronald McDonald House Charities! 

My Hero, Stampin Up, masculine hand stamped card

How To Make It: 

Using the Lucky Stars Textured Impressions Embossing folder and the Big Shot, emboss the Smoky Slate cardstock base.

Adhere the Night of Navy cardstock piece to the front of the card base. Adhere the striped Neutrals Designer Series Paper to the center of the Night of Navy piece.

Stamp the 'You are My #1 Hero' image from the My Hero stamp set on Whisper White cardstock in Night of Navy ink and punch out using the Best Badge punch.

From a scrap of Night of Navy cardstock, punch one banner from the Duet Banner punch (the punch has two banners; use the simple one). Then cut the banner in half and then flip one piece over so you have two little banners that will adhere to the bottom of the Hero image.

Adhere the two little banner pieces to the back of the Hero badge piece using Glue Dots. Put several Stampin' Dimensionals on the back (as well as on the little banners).

Using the Banner Triple punch, punch banner ends in a ¾” X 3 ½” strip of Night of Navy cardstock. Adhere to the front of the card. Then, adhere the badge piece to the front of the card.

Finally, adhere three Regals Enamel Shape stars randomly on the card front.

Stamps: 

My Hero- 141954 wood, 141957 clear mount

Paper: 

Smoky Slate card stock (131202), Night of Navy card stock (100867), Neutrals Designer Series Paper Stack (138435), Whisper White card stock (100730)

Ink:

Night of Navy (126970)

Other: 

Best Badge punch (140633), Banner Triple Punch (138292), Duet Banner punch (141483), Regals Enamel Shapes (141681), Lucky Stars Embossing Folder (135817), Big Shot Die Cutting Machine (143263), SNAIL Adhesive (104332), Glue Dots (103683), Stampin’ Dimensionals (104430)

Thanks for stopping by! Have a great weekend!


blog-signature-holiday

QUICK LINKS: 
1. 25% OFF SELECTED STAMPS – Until Nov. 30th
2. HOLIDAY CATALOGUE – Sept. 1 to Jan. 3
3. CLEARANCE RACK– Save up to 60%
4. JO JO POINTS– Earn free stamps with my Jo Jo Points Program    

Read more
Merriest Wishes stamp set, Cupcake Cutouts Framelits, Stampin Up, by StampingJo

Merriest Wishes Christmas Card

Posted on November 10, 2016November 10, 2016 by Josee

Good Morning!

Today's card is a Christmas card featuring the Merries Wishes stamp set combined with the Time of Year hostess stamp set and Cupcake Cutout Thinlits. 

Merriest Wishes stamp set, Cupcake Cutouts Framelits, Stampin Up, by StampingJo

How To Make It: 

This card starts with a Pool Party cardstock cardbase. Then a layer of Fancy Frost Designer Series Paper was added-I used the diagonal stripes but you could use any of the gorgeous embossed patterns available in the specialty pack.

Then, on Whisper White cardstock, the ornamental circles from the Merriest Wishes stamp set were stamped using various colors of ink: Pool Party, Sweet Sugarplum and Dapper Denim. 

Each of the stamped circle images was then punched out using coordinating sizes of circle punches:  ¾” Circle Punch, 1 ¼” Circle Punch and the 1 ¾” Circle Punch.

With Dapper Denim ink on Whisper White cardstock, stamp the 'Christmas' banner and use the Bunch of Banners Framelits to cut it out.

Use Sweet Sugarplum cardstock to die cut the 'wish' using the Cupcake Cutout Thinlits dies. It will help to have the Precision Plate and Die Brush for this die cut.

A strip of Tear & Tape Adhesive was placed on the bottom quarter of the card, the protective layer peeled off and then the Sweet Sugarplum Glitter Ribbon was added on, carefully pleating the end of the strip of ribbon (as shown).Merriest Wishes, Cupcake Cutout Thinlits, Christmas Card by StampingJo

Then, start adhering the stamped & punched circles to the cardfront, using SNAIL Adhesive and Stampin' Dimensionals to add some depth to some of the circles.

Adhere the die cut 'WISH' using the Fine Tip Glue Pen. Then add a Rhinestone Basic Jewel to dot the 'i'. Add a few more rhinestones to the cardfront. 

Finally, add the stamped/die cut Christmas Banner using Stampin' Dimensionals. 

Stamps: 

Merriest Wishes stamp set- 142063 wood, 142066 clear mount; Time of Year Hostess stamp set- 141790

Paper: 

Sweet Sugarplum cardstock- 141418, Pool Party cardstock- 1229240, Whisper White cardstock-100730, Fancy Frost Designer Series Paper-142014

Ink:

Sweet Sugarplum ink-141395, Dapper Denim ink-141394, Pool Party ink-126982

Other: 

3/8” Glitter Ribbon Combo Pack-142015 (use the Sweet Sugarplum ribbon), Cupcake Cutout Thinlits- 141474, Stampin Dimensionals-104430, Bunch of Banners Framelits-141488, ¾” Circle Punch- 119873, 1 ¼” Circle Punch-119861 , 1 ¾” Circle Punch- 119850, Rhinestones Basics Jewels- 119246, • Tear & Tape Adhesive-138995, Die Brush-140603, Precision Plate-139684, Fine Tip Glue Pen- 138309, SNAIL Adhesive- 104332, Refill- 104331

Thanks for stopping by! Have a great day!


blog-signature-holidayQUICK LINKS: 
1. 25% OFF SELECTED STAMPS – Until Nov. 30th
2. HOLIDAY CATALOGUE – Sept. 1 to Jan. 3
3. CLEARANCE RACK– Save up to 60%
4. JO JO POINTS– Earn free stamps with my Jo Jo Points Program    


Read more
Floral Phrases, Detailed Floral Thinlits, 50th Anniversary Card, Congratulations card, Stampin Up, StampingJo.com

Detailed Floral Thinlits Golden Anniversary Card

Posted on November 9, 2016November 7, 2016 by Josee

Hello! 

A friend of mine needed a card for a very special anniverary in her family- a 50th wedding anniversary! Can you believe it? 50 years together! How wonderful! So, today's card is a gorgeous card that we came up with that is a perfect golden anniversary card for a very special anniversary! We used the Detailed Floral Thinlits and the Floral Phrases stamp set to create this card.

Floral Phrases, Detailed Floral Thinlits, 50th Anniversary Card, Congratulations card, Stampin Up, StampingJo.com

How To Make It: 

This card starts with a cardbase of Whisper White Thick cardstock. Then the Detailed Floral Thinlits Dies were used to cut the Gold Foil Sheet for the bottom of the card- using the Precision Base Plate and Die Brush is super helpful for these precision die cuts! The Fine Tip Glue Pen was used to adhere the die cut to the cardbase.

The Rhinestones Basics Jewels were colored using the Gold Wink of Stella– then heat set with the Heat Tool. Once dry, they were placed along the top of the floral die cut.

Use the banner label from the Project Life Cards and Labels Framelits to die cut some Whisper White cardstock. Then, use Whisper White ink (or Versamark) to stamp the sentiment from the Floral Phrases stamp set and immediately sprinkle with some Gold Stampin' Emboss Powder, then set with the Heat Tool.

Use the 1/16" Handheld Circle Punch to punch a small hole in the top of the label die cut then thread some Whisper White Baker's Twine through the hole. 

Tip: Use a needle threader to get the baker's twine through the small hole!

Inside the card, on the back of the card front, place a strip of Tear & Tape Adhesive, peel off the protective strip and then place the middle of a strand of White Organza Ribbon on the sticky strip to hold it in place, and bring the rest of the ribbon back to the front of the card. Tie the strand of Organza Ribbon once, then add a strand of Gold Sequin Trim and the Whisper White Baker's Twine with the sentiment label attached. Tie a knot in the ribbon and then tie a lovely bow, trimming off the edges of the ribbon. 

inside-of-golden-anniversary-card-by-stampingjo

A lovely sentiment was added to the inside of the card- stamped with some Basic Black ink leaving room to sign the card. 

Stamps: 

Floral Phrases-141764 wood, 141767 clear-mount (or get the discounted bundle! 142354 wood, 142355 clear-mount)

Paper: 

Whisper White Thick- 140272, Gold Foil Sheets-132622, Whisper White- 100730

Ink:

Whisper White ink- 101731, Gold Wink of Stella-141898, Archival Black- 140931, Refill- 140928

Other: 

Detailed Floral Thinlits-141482 ,Project Life Cards and Labels Framelits-135707, Gold Embossing Powder- 109129, Rhinestones Basic Jewels-119246 , White 5/8" Organza Ribbon- 114319, Gold Sequin Trim- 132983, White Baker's Twine-124262 , Fine Tip Glue Pen-138309, Heat Tool- 129053, Tear & Tape Adhesive- 138995, 1/16" Handheld Circle Punch-134363, Big Shot- 143263, Die Brush- 140603, Precision Base Plate- 139684

I hope you have a stampin' good day!


blog-signature-holidayshareableimage_3_na
    hostess code graphic-monthly


Read more

Posts pagination

  • Previous
  • 1
  • …
  • 225
  • 226
  • 227
  • 228
  • 229
  • 230
  • 231
  • …
  • 587
  • Next

go to store