Happy Friday!
Before I show you today's card, there is so much good stuff to tell you about, so I will get it out of the way first 🙂 But you'll be glad I did! Tomorrow is World Card Making Day! So, I do hope you get some time to stamp! Stampin' Up is celebrating by offering a SALE! 
This sale starts tomorrow, October 1st, so make sure you check back tomorrow for actual shopping. Plus, there is also a B3GO SALE on Designer Series Paper! 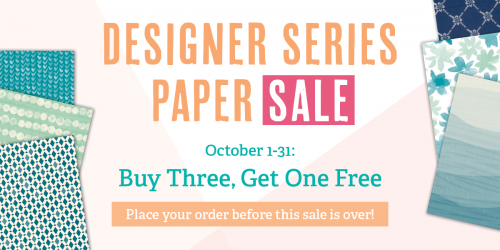
You can see full details of both these offers here. Or shop directly here starting tomorrow!
Thanks for bearing with me. Now, onto today's card….Well, this week on the blog was all about Halloween and Thanksgiving. If you missed any posts this week, make sure you check them out! You can see some gorgeous cards from Monday's Crafty Friends, this treat bag, this cute scarecrow card and this quick and easy card!
Now, I really love the simplicity of today's card because even though it seems simple it has a huge impact! Plus, using Washi Tape is actually a lot of fun- especially when you can use it to adhere the card layers- that is a bonus!

How To Make It:
Score the Pumpkin Pie card base at 4 ¼” and fold in half.
Grab your Basic Black Stampin’ Write Marker and draw a border around the card front leaving a ¼” border around each side. NOTE: You do not need to draw perfectly straight lines.
Using all 5 spools of Halloween Night Designer Washi Tape, add random lengths to the card base front.
Punch the 2” Whisper White cardstock piece using the Scalloped Tag Topper Punch.
Ink up the spooky house image from the Halloween Scares stamp set using the Black Ombre Stampin’ Pad and stamp onto the 2” Scalloped Tag. Add Stampin’ Dimensionals to the back and set in place on the Pumpkin Pie cardbase front.
Ink up the little word bubble image from the Halloween Scares stamp set using Perfect Plum ink and stamp onto a piece of Whisper White scrap cardstock.
Stamp the “eek” from the Spooky Fun stamp set onto the stamped word bubble using Old Olive ink. Hand cut the word bubble using Paper Snips. Add the word bubble with Stampin’ Dimensionals to the scalloped tag.
Stamp the sentiment “happy Halloween” from the Spooky Fun stamp set with Archival Basic Black ink onto the strip piece of Pumpkin Pie. Die cut using the Bunch of Banners Framelits Die and the Big Shot. Snip off the right portion of the banners and set in place with a piece of Halloween Night Designer Washi Tape.
Tie a bow using both colors of the Halloween Night Baker’s Twine, trim to desired length and add to the Whisper White tag using Multipurpose Liquid Glue.
Ink the smaller set of 3 bats from the Halloween Scares stamp set using Archival Basic Black ink and stamp onto the Pumpkin Pie card front.
Measurements:
• Pumpkin Pie Cardstock – 5-1/2” x 8-1/2” • Whisper White Cardstock – 2” x 4-1/8” • Whisper White Cardstock – scrap piece for word bubble • Pumpkin Pie Cardstock – 2-1/2” x ¾”scrap piece for words • Halloween Night Baker’s Twine – 8”
Stamps:
Halloween Scares (142226 – Wood Mount; 142229 – Clear Mount); Spooky Fun (142236)
Paper:
Whisper White (100730); Pumpkin Pie (105117)
Ink:
Black Ombre Stampin’ Pad (141850); Basic Black Archival Stampin’ Pad (140931), Perfect Plum (126963), Old Olive (126953)
Other:
Scalloped Tag Topper (133324), Halloween Night Designer Washi Tape (142026), Halloween Night Baker’s Twine (142027), Basic Black Stampin’ Write Marker (100082), Bunch of Banners Framelits (141488), Stampin’ Trimmer (126889); Big Shot (143263), Paper Snips (103579), Stampin’ Dimensionals (104430), Multipurpose Liquid Glue (110755)
I hope you have an amazing weekend!