Good Morning!
Now that Fall is officially here, it's time to dig out the sweaters and light gloves for these cold mornings AND time to start thinking about what you're going to wear for Halloween and what you are going to dish out at the door!
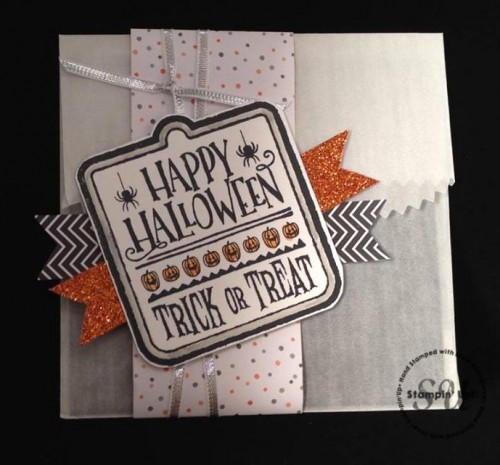
These little Glassine treat bags are super simple to make with a few supplies! Use the Halloween Treat stamp and Halloween Night Specialty Designer Series Paper for a cute Halloween themed bag, or change up the sentiment and Designer Series Papers for a Thanksgiving party favor!

How To Make It:
Stamp “Happy Halloween” from the Halloween Treat stamp set in Basic Black on Whisper White Cardstock. Color with Smoky Slate and Pumpkin Pie Stampin' Write markers and cut out with Paper Snips.
Cut strips of Pop of Pink Designer Series Paper and Pumpkin Pie Glimmer Paper and use Paper Snips or Banner Triple Punch to trim the ends into banner tips as shown.
Put Basic Black paper into Glassine Bag (and add whatever treats you want to the bag) and fold the top of the bag over.
Wrap Halloween Night Designer Series Paper around the bag and tie the Silver Ribbon.
Assemble the banner strips using SNAIL Adhesive and use Stampin’ Dimensionals on the back of the “Happy Halloween” square.
Measurements:
• Whisper White: 3 x 3 • Basic Black: 4 ¼ x 4 ½ (for inside bag) • Pop of Pink Designer Series Paper: 4 ¼ x ¾ • Pumpkin Pie Glimmer Paper: 4 ¼ x ¾ • Halloween Night Designer Series Paper: 10 x 2 (scored at 2” and 6 ¾”)
Stamps:
Halloween Treat #142249
Paper:
Whisper White #100730, Basic Black #121045, Pop of Pink Designer Series Paper #141648, Pumpkin Pie Glimmer Paper #142029, Halloween Night Designer Series Paper #142022
Ink:
Basic Black Archival Stampin’ Pad #140931, Smoky Slate Marker #131261, Pumpkin Pie Marker #131259
Other:
Glassine Gift Bags #141700, Silver 1/8” Ribbon #132137, Paper Snips #103579, Stampin’ Dimensionals #104430, SNAIL Adhesive #104332
I hope you have a stampin' good day!


