Skip to content

Hand Stamped Cards with Josee Smuck-Stampin' Up! Canada Demonstrator

Stampin' Up! Canada Demonstrator; Rubber Stamps & Supplies for Cardmaking & Scrapbooking in Stittsville, Ontario (near Ottawa)

Menu
  • Home
  • JO JO POINTS
  • **Join**
  • Monthly Craft Kit
  • Weekly News
  • Shop Now
  • Contact Me
Menu

Author: Josee

Envelope Corner Bookmark

Posted on February 15, 2017February 17, 2017 by Josee

Happy Hump Day!! Today's project is a quick and easy gift idea or just something for yourself- an Envelope Corner Bookmark featuring Stampin' Up's Love Sparkles stamp set, Bold Butterfly Framelits and Floral Affection Textured Impressions Embossing Folder.

This idea came about when I had grabbed an envelope to use one day and realized it was dirty, so didn't want to use it to send the card I had, but hated to throw it away. It sat on my desk for a little while, but I finally got around to putting this idea I had to work.

envelope corner bookmark,Love Sparkles,Bold Butterfly Framelits, Butterfly Thinlits, Floral Affection Textured Impressions Embossing Folder, Silver Metallic Foil Doilies Stampin Up

These corner bookmarks are made from the two corners of one card sized envelope.

How To Make This Envelope Corner Bookmark:

Start by grabbing an envelope that needs recycling. You can even use a used envelope from something that was mailed to you and just adjust the size of your cardstock accordingly. Seal the envelope if it's not already and the cut the corners off the envelope- you should be able to get at least two bookmarks from each envelope.

Tip: One thing to keep in mind when making any bookmark is that you don't want to make the bookmark too bulky. Too much bulk can potentially ruin the pages of a good book.

Then, I cut two pieces of Watermelon Wonder cardstock to fit the cut envelope corners. I found it easier to cut a square of the cardstock first and then cut the square in half to get the two triangles. I started with a square about 4". If you cut the envelope too much, just trim the envelope around the cardstock you just cut.

On this one, I embossed the Watermelon Wonder triangle with the Floral Affection Textured Impressions Embossing Folder. Then, I cut a Silver Metallic Foil Doily in half and wrapped it around each corner adhering it with Mini Glue Dots. The whole triangle was adhered to the envelope corner bookmark with Tear and Tape Adhesive.

The Silver Foil Sheet was die cut with the Butterflies Thinlits dies and the Dazzling Diamonds Glimmer Paper was die cut with the Bold Butterfly Framelits and both were adhered with Mini Glue Dots and then adhered to the envelope corner bookmark.

The second bookmark uses the other half of the Watermelon Wonder square turned triangle. Rub the Embossing Buddy all over the cardstock triangle to keep the static down.

First I stamped the 'Sparkle' greeting from the Love Sparkles stamp set with Versamark ink then sprinkle with Gold Embossing Folder and heat set with the Heat Tool.

Then the little stars confetti stamp from the Love Sparkles stamp set was stamped with White Craft Ink and sprinkled with White Embossing Powder and also heat set with the Heat Tool.

The smaller greeting from the Love Sparkles stamp set was stamped with Watermelon Wonder ink on Whisper White cardstock and then punched with the Classic Label Punch.

I then added little strips of Rhinestones Basics Jewels.

Of course, you can dress up your envelope corner bookmarks any way you like, just keep in mind my tip for not adding too much bulk.

Stampin' Up Stamps:

Love Sparkles stamp set- 143114 wood mount, 143183 clear-mount

Stampin' Up Paper:

Medium Envelope Whisper White-107301, Watermelon Wonder cardstock-138334 , Whisper White cardstock- 100730, Silver Foil Sheet-132178 , Dazzling Diamonds Glimmer Paper- 135315

Stampin' Up Ink:

White Craft Stampin Pad-101731, Versamark Ink- 102283, Watermelon Wonder ink- 138323

Other Stamp Supplies and Tools:

Bold Butterfly Framelits-138135, Butterflies Thinlits-137360, Floral Affection Textured Impressions Embossing Folder-141713, Metallic Foil Doilies-138392, Rhinestones Basic Jewels-119246, Gold Embossing Powder- 109129, White Embossing Powder-109132, Embossing Buddy- 103083, Heat Tool- 129053, Classic Label Punch- 141491, Tear & Tape Adhesive- 138995, Mini Glue Dots- 103683

Have a wonderful Wednesday! I hope you are inspired to create your own envelope corner bookmark!


blog-signature-spring

QUICK LINKS: 
2017 OCCASIONS CATALOGUE– NEW Spring Catty!! Check it out! Available January 4th to May 31st

SALE-A-BRATION– Choose a FREE Sale-A-Bration product with every $60 you spend before taxes and shipping! January 4th to March 31st! NEW freebies coming February 21st!

CLEARANCE RACK– Save up to 60%  

JO JO POINTS– Earn free stamps with my Jo Jo Points Program    

Read more
Dragonfly Dreams stamp set, Detailed Dragonfly Thinlits, Cupcake Cutout Framelits, Stampin Up, 2017 Occasions catalogue, stamped card idea

Dragonfly Dreams Stamp Set

Posted on February 14, 2017February 17, 2017 by Josee

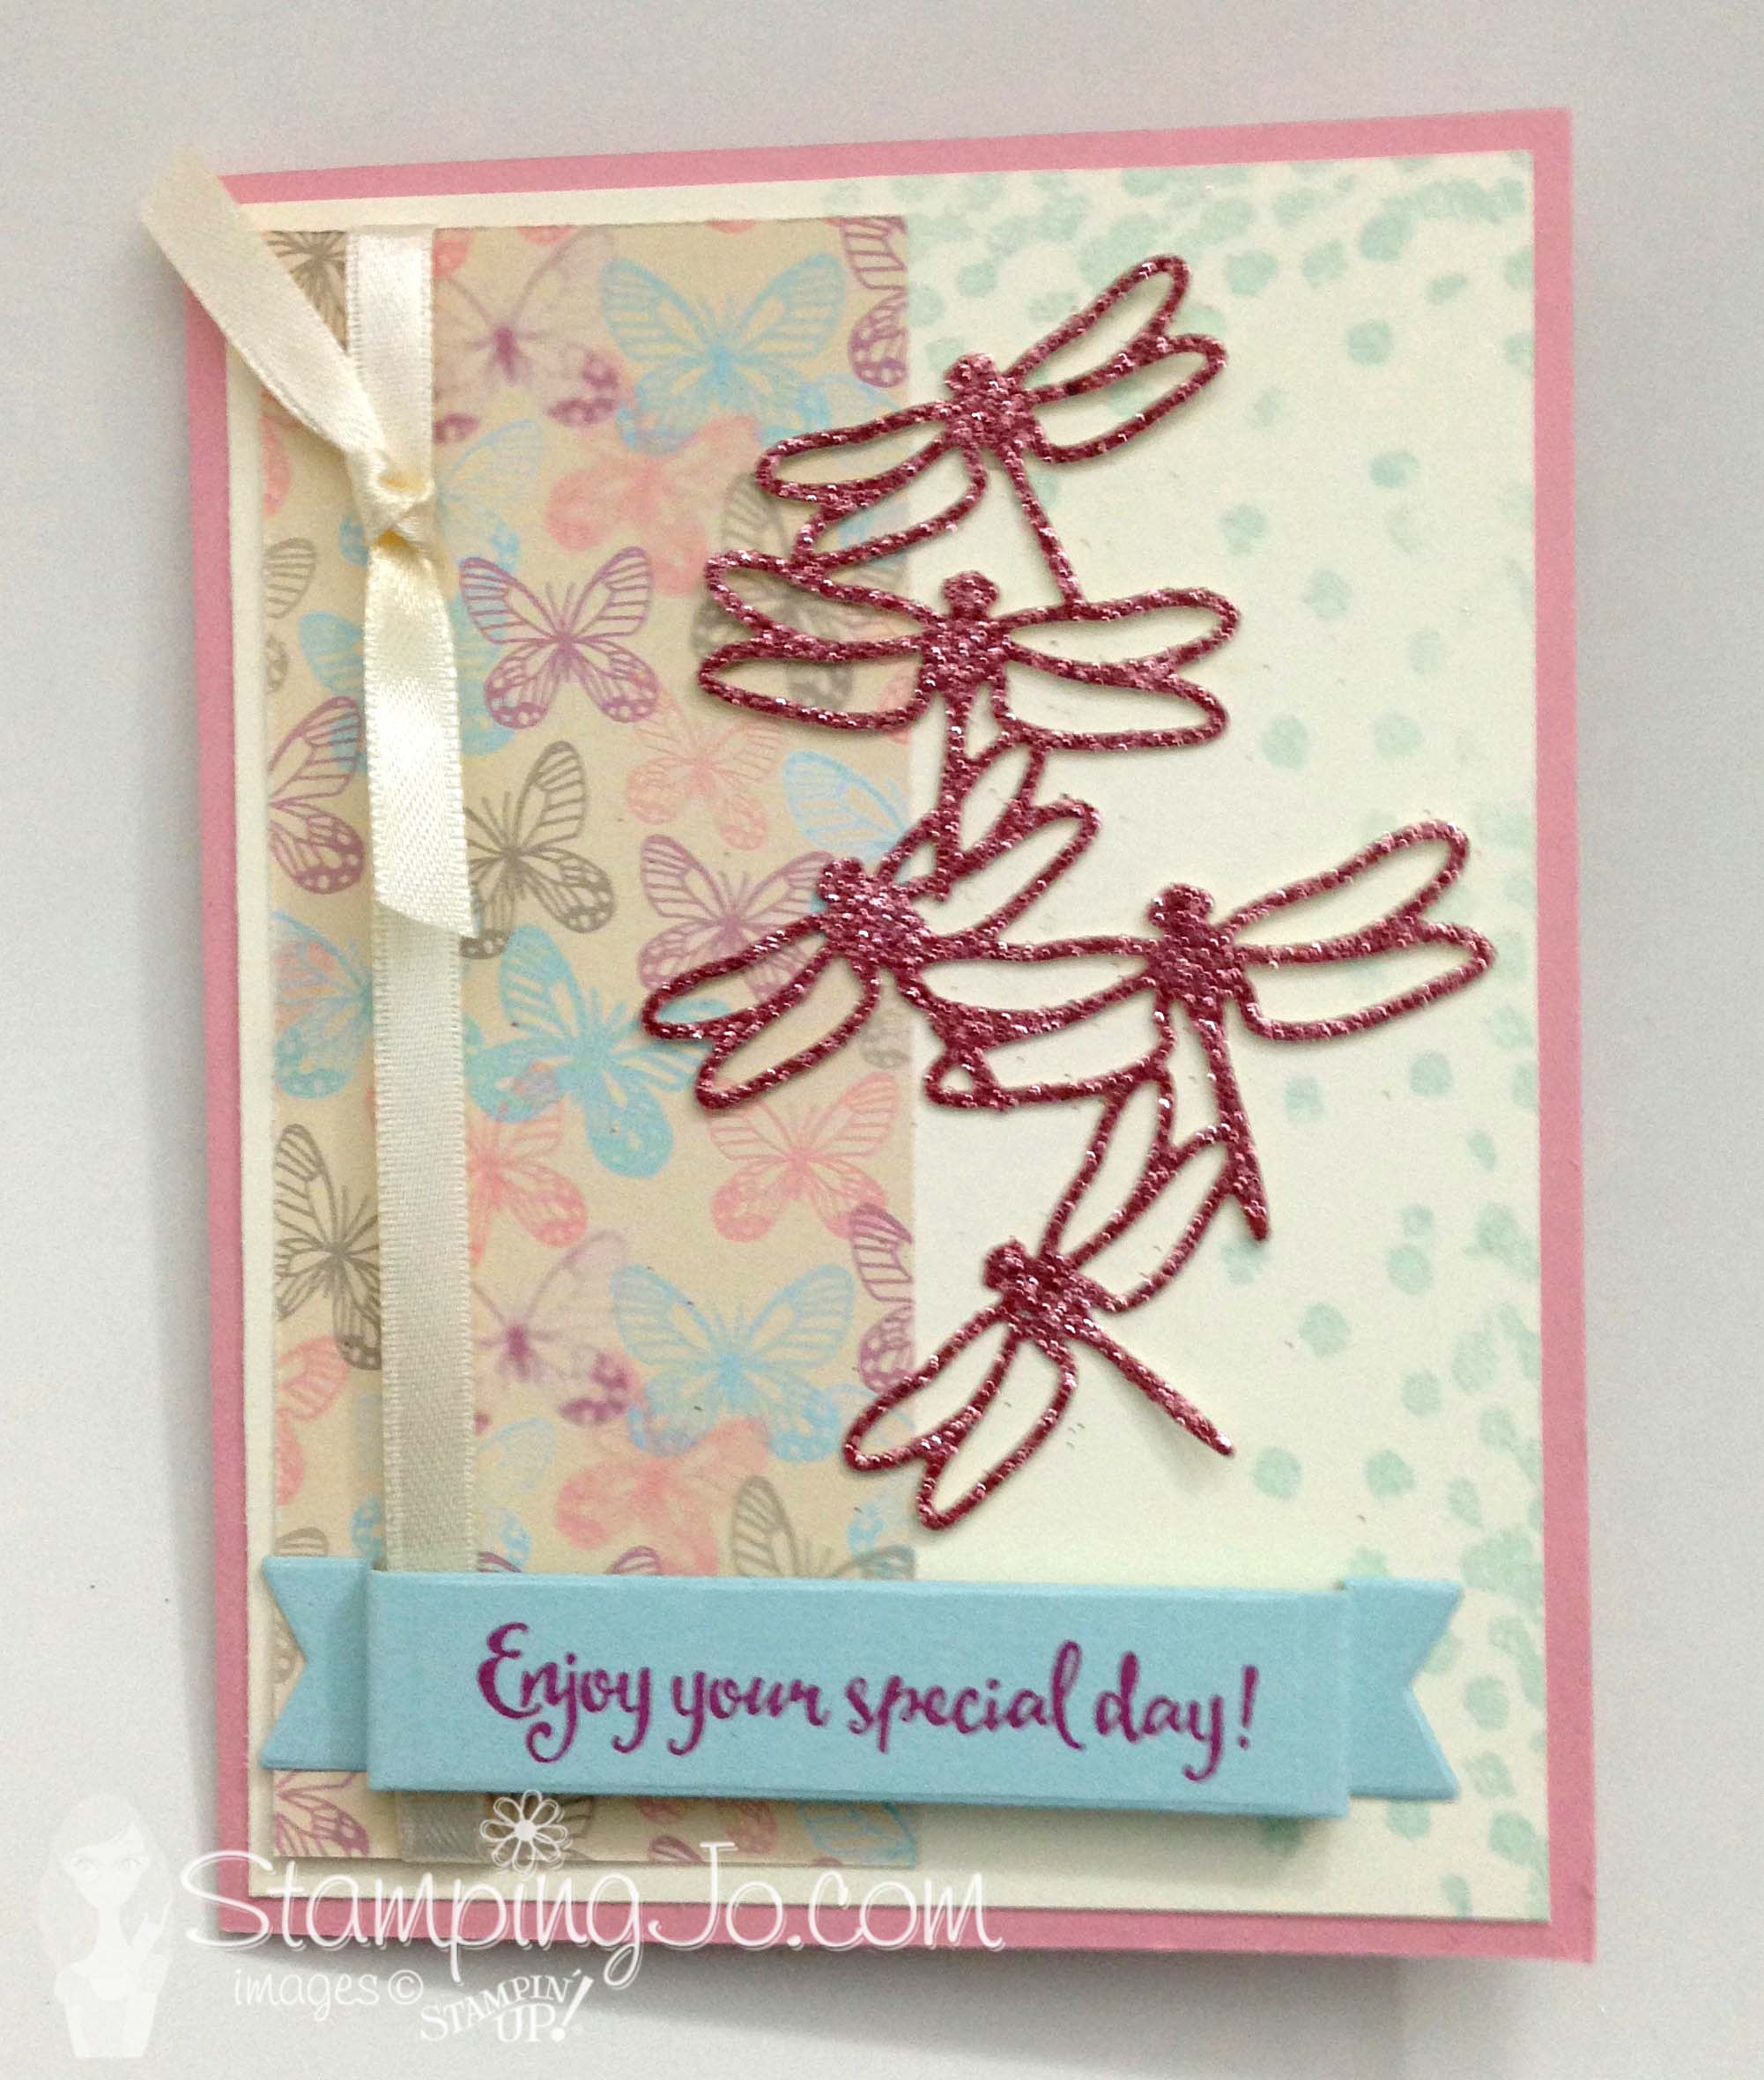
Hello!! heartHappy Valentine's Day!  heartToday's card is a pretty in pink card featuring Stampin' Up's Dragonfly Dreams stamp set and Detailed Dragonfly Thinlits to create this cute hand stamped card!

Dragonfly Dreams stamp set, Detailed Dragonfly Thinlits, Cupcake Cutout Framelits, Stampin Up, 2017 Occasions catalogue, stamped card idea, Dragonfly Dreams stamped card

How To Make This Stamped card:

This card starts with a base of Blushing Bride cardstock.

On a layer of Very Vanilla cardstock, the dotted texture stamp from the Dragonfly Dreams stamp set was stamped in Soft Sky ink. Then the layer was adhered to the card base with SNAIL Adhesive.

Cut a strip of Falling In Love Designer Series Paper and then tie some Very Vanilla Satin Ribbon to it (first adhere a strip of ribbon to the back of the paper strip, then tie a separate piece of ribbon around that to make it look like one tied piece). Then adhere it to the cardfront.

Stamp the greeting from the Dragonfly Dreams stamp set with Sweet Sugarplum ink on Soft Sky cardstock. Cut it out using the banner die from the Cupcake Cutouts Framelits. Adhere the banner ends to the cardfront with Mini Glue Dots.

Take the Blushing Bride Glimmer Paper and run it through the Big Shot with the Detailed Dragonfly Thinlits. Then adhere the die cut dragonflies to the cardfront using Mini Glue Dots.

Stampin' Up Stamps:

Dragonfly Dreams-142924

Stampin' Up Paper:

Blushing Bride-131198, Very Vanilla-101650, Falling In Love Designer Series Paper-142788, Soft Sky-131203, Blushing Bride Glimmer-140550

Stampin' Up Ink:

Soft Sky-131181, Sweet Sugarplum-141395

Other Stamp Supplies and Tools:

Very Vanilla Satin Ribbon- 142794, Cupcake Cutouts Framelits-141474, Detailed Dragonfly Thinlits-142749, Mini Glue Dots- 103683, SNAIL Adhesive- 104332, Refill- 104331

I hope you enjoyed today's card using the Dragonfly Dreams stamp set. Have a great Valentine's day! 


blog-signature-spring

QUICK LINKS: 
2017 OCCASIONS CATALOGUE– NEW Spring Catty!! Check it out! Available January 4th to May 31st

SALE-A-BRATION– Choose a FREE Sale-A-Bration product with every $60 you spend before taxes and shipping! January 4th to March 31st! NEW freebies coming February 21st!

CLEARANCE RACK– Save up to 60%  

JO JO POINTS– Earn free stamps with my Jo Jo Points Program    

Read more

My Crafty Friends Monday: Sale-A-Bration Stamp Sets

Posted on February 13, 2017February 17, 2017 by Josee

My Crafty Friends Monday-NEW-SMIf you have been following my blog for awhile, you know that each Monday, I like to feature different projects that have inspired me and I know they'll inspire you too! This week we've got some great samples of hand made cards using the Sale-A-Bration stamp sets: Avant Garden, Hey Chick, So Very Much and Tasty Truck!Each project was created by different & amazingly talented stampers that participated in a card swap I was in last month.

This week's featured cards use some of the Sale-A-Bration stamp sets you can get for FREE with every $60 you spend in my store before taxes and shipping.


Avant Garden stamp set

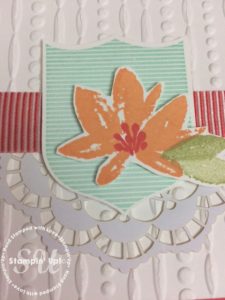
Avant Garden stamp set, Stampin Up, Sale-A-Bration, stamped card ideasAvant Garden stamp set, Stampin Up, Sale-A-Bration, stamped card ideas

Rhonda Morgan used the Avant Garden FREE stamp set along with the Festive Textured Impressions Embossing Folder and Delicate White Doilies for this card.


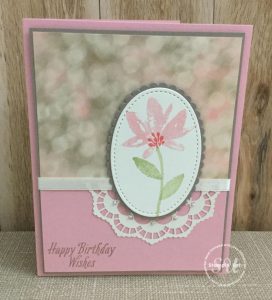
Avant Garden stamp set, Stampin Up, Sale-A-Bration, stamped card ideas

This card by Peggy Murwin is lovely with the Falling In Love Designer Series Paper, Layered Oval Framelits and Delicate White Doilies.


Hey Chick stamp set

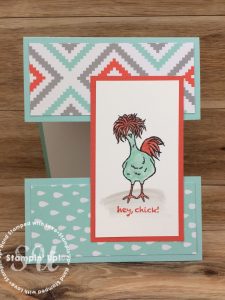
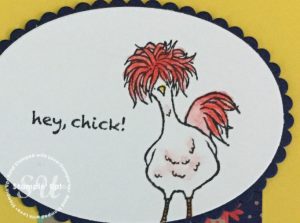
Hey Chick stamp set, Stampin Up, Sale-A-Bration, stamped card ideasHey Chick stamp set, Stampin Up, Sale-A-Bration, stamped card ideas

Shawn Perez's card is really cute with this great card design and the A Little Foxy Designer Series Paper.


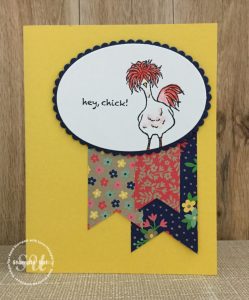
Hey Chick stamp set, Stampin Up, Sale-A-Bration, stamped card ideasHey Chick stamp set, Stampin Up, Sale-A-Bration, stamped card ideas

This card by Georgia Giguere with the Affectionately Yours Specialty Designer Series Paper is perfect for this chicken stamp from the Hey Chick stamp set.


Hey Chick stamp set, Stampin Up, Sale-A-Bration, stamped card ideas

Charlotte Minear used another Sale-A-Bration freebie on this card, the Carried Away Designer Series Paper.


So Very Much Stamp Set

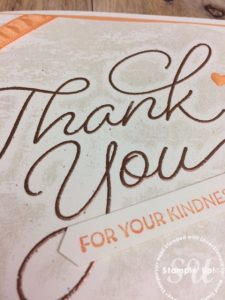
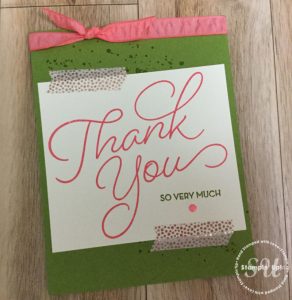
So Very Much stamp set, Stampin Up, Sale-A-Bration, stamped card ideasSo Very Much stamp set, Stampin Up, Sale-A-Bration, stamped card ideas

This card by Linda Beauwin looks great with these colors and the Copper Embossing Powder looks great!


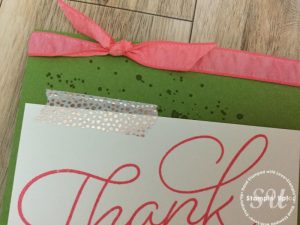
So Very Much stamp set, Stampin Up, Sale-A-Bration, stamped card ideasSo Very Much stamp set, Stampin Up, Sale-A-Bration, stamped card ideas

This card by Cindy Rattray uses the Affectionately Yours Designer Washi Tape to add a simple layer to the card front.


Tasty Truck stamp set

Tasty Truck stamp set, Stampin Up, Sale-A-Bration, stamped card ideas

This card by Jessica Hill also uses the Sale-A-Bration free paper, the Carried Away Designer Series Papers.


Love these ideas? You can get these stamp sets for FREE with every $60 you purchase through my ONLINE STORE! 

I hope you've enjoyed this week's My Crafty Friends Monday featuring Sale-A-Bration stamp sets! Make sure you get your freebies before March 31st!    


blog-signature-spring

QUICK LINKS: 
2017 OCCASIONS CATALOGUE– NEW Spring Catty!! Check it out! Available January 4th to May 31st

SALE-A-BRATION– Choose a FREE Sale-A-Bration product with every $60 you spend before taxes and shipping! January 4th to March 31st!

CLEARANCE RACK– Save up to 60%  

JO JO POINTS– Earn free stamps with my Jo Jo Points Program    

Read more
Sweet & Sassy Framelits, Sealed With Love, Valentine treat bag, Stampin Up

Valentine Treat Bag using Sweet and Sassy Framelits and Sealed With Love stamp set

Posted on February 10, 2017February 17, 2017 by Josee

Happy Friday!! If you are still trying to figure out what to give for Valentine's Day (which is next week by the way!) Today's project is a quick and easy Valentine gift idea featuring Stampin' Up's Sealed With Love stamp set and Sweet and Sassy Framelits to create this cute Valentine treat bag!

Sweet & Sassy Framelits, Sealed With Love, Valentine treat bag, treat bag topper, Stampin Up, hearts, candy, quick and easy, Valentine gift idea

How To Make This Stamped Valentine treat bag:

This really is a super easy Valentine gift idea! Take a cellophane bag and fill with some Valentine colored treats- I found these Smarties at my local bulk food store.  Fold the bag top and use the Handheld Stapler to keep the bag top closed.

Now, because I made a few of these, I used a whole sheet of cardstock that I scored and folded in half lengthwise. If you are only making one, just size it accordingly but you will want to score and fold the cardstock to create a 'card' that you will cut in a heart shape with the Sweet and Sassy Framelits dies and the Big Shot. I actually used the largest and second largest heart dies on mine, but you can use whatever size you need to fit the bag you are using. Just make sure the stamps you want to use will fit the heart. If you don't like to waste cardstock, just use your die to roughly measure where you need to fold the cardstock.

The folded cardstock was then run through the Big Shot, making sure to not cut through the whole folded line. This would be a great place to use the Magnetic Platform so that the die does not shift when you place the cutting plate on top. You want to end up with a heart cutout that folds open to create a topper for the Valentine treat bag.

Stamp the die cut heart with the Happy Valentine's Day stamp from the Sealed With Love stamp set.

The heart flourish from the Sealed With Love stamp set was bent in the curved shape before placing on the acrylic block and then stamped around the curve of the heart tops.

Sweet & Sassy Framelits, Sealed With Love, Valentine treat bag, treat bag topper, Stampin Up

Place the cellophane bag inside the heart bag topper and use the Handheld Stapler to secure it onto the bag.

That's it! So simple. Of course, if I wanted to spend more time on these, I could add ribbon, Rhinestones, maybe even create a layered heart die cut! If you don't like to see the exposed staples, you could use Tear & Tape Adhesive to adhere both sides of the bag topper to the cellophane bag.

Stampin' Up Stamps:

Sealed With Love (2017 Occasions Catalogue)-142815 Photopolymer

Stampin' Up Paper:

Melon Mambo carstock-115320 , Blushing Bride cardstock-131198

Stampin' Up Ink:

Whisper White Craft ink-101731, Refill:101780; Memento Tuxedo Black- 132708, Refill-133456

Other Stamp Supplies and Tools:

Sweet and Sassy Framelits Dies- 141707, Handheld Stapler- 139083, Silver Mini Staples- 135847, Cellophane Bags-141704,Magnetic Platform- 130658

Have a wonderful weekend!  I hope you enjoyed today's Valentine treat bags!


blog-signature-spring

QUICK LINKS: 
2017 OCCASIONS CATALOGUE– NEW Spring Catty!! Check it out! Available January 4th to May 31st

SALE-A-BRATION– Choose a FREE Sale-A-Bration product with every $60 you spend before taxes and shipping! January 4th to March 31st! NEW freebies coming February 21st!

CLEARANCE RACK– Save up to 60%  

JO JO POINTS– Earn free stamps with my Jo Jo Points Program    
Read more
Tasty Truck, Stampin Up, Sale-A-Bration, 2017

Tasty Truck Stamp Set Stamped Card

Posted on February 9, 2017February 17, 2017 by Josee

Good day! Today's cards feature Stampin' Up's Tasty Truck stamp set from the 2017 Sale-A-Bration freebies to create this brightly colored sweet hand stamped card! This stamp set is yours FREE with every $60 you spend in my store!

Tasty Truck stamp set, Stampin Up, 2017 Sale-A-Bration

How To Make This Stamped Card:

Start this card with a base of Melon Mambo cardstock. Then add a layer of Daffodil Delight cardstock.

The next layer of Pumpkin Pie cardstock was run through the Big Shot in the Confetti Textured Impressions Embossing Folder. Before adhering this embossed layer to the cardfront, add the Silver Natural Trim across the front, adhering it to the back and tying bits of ribbon to the sides. 

On a piece of Shimmery White cardstock, stamp the truck from the Tasty Truck stamp set with Basic Black Archival ink, adding in the cupcakes to the window. Color in the truck and details using the Watercolor Pencils and a Blender Pen. Then die cut this stamped image using the Stitched Shape Framelits oval. Add some Wink of Stella to the windows and lights on the truck and then adhere to the cardfront.

Stamp the sentiment and the little banners from the Tasty Truck stamp set on Whisper White cardstock. Color the banners with the Watercolor Pencils and a Blender Pen and then punch out using the Classic Label Punch.

Then, take the Melon Mambo cardstock and punch out two pieces with the Classic Label Punch. With Paper Snips, cut off one end of each Melon Mambo punch out to create one longer punch out to mat the stamped and punched sentiment strip. Use Mini Glue Dots to adhere the Melon Mambo punch out to the stamped punch out and adhere to the cardfront also using the Mini Glue Dots.

Stampin' Up Stamps:

Tasty Trucks (2017 Sale-A-Bration)-143300

Stampin' Up Paper:

Melon Mambo-115320, Daffodil Delight-119683, Pumpkin Pie-105117, Shimmery White-101910, Whisper White-100730

Stampin' Up Ink:

Basic Black Archival-140931, Wink of Stella Clear-141897

Other Stamp Supplies and Tools:

Watercolor Pencils-141709, Classic Label Punch-141491, Blender Pen-102845, Confetti Textured Impressions Embossing Folder-140592, Silver Natural Trim-141485, Stitched Shape Framelits-145372, Tear & Tape Adhesive-138995, Stampin Dimensionals-104430, Mini Glue Dots- 103683, Paper Snips-103579

I hope you enjoyed today's Tasty Truck stamped card! Don't forget the Tasty Truck stamp set is only one of the FREE items you can choose with every $60 you spend (before taxes and shipping) during Sale-A-Bration! Have a stampin' good day!


blog-signature-spring

QUICK LINKS: 
2017 OCCASIONS CATALOGUE– NEW Spring Catty!! Check it out! Available January 4th to May 31st

SALE-A-BRATION– Choose a FREE Sale-A-Bration product with every $60 you spend before taxes and shipping! January 4th to March 31st! NEW freebies coming February 21st!

CLEARANCE RACK– Save up to 60%  

JO JO POINTS– Earn free stamps with my Jo Jo Points Program    
Read more

Posts pagination

  • Previous
  • 1
  • …
  • 212
  • 213
  • 214
  • 215
  • 216
  • 217
  • 218
  • …
  • 587
  • Next

go to store

Promos

Paper Bouquet Kit

josee smuck

Josée Smuck

Stampin’ Up! Canada Demonstrator since 2002
Ottawa, ON, Canada
Contact me with questions!
Josee@StampingJo.com
(613) 831-2917

Current Catalogues

Annual Catalogue (May2024-April2025)Stampin' Up! Annual CatalogueView Catalogue-ENG | Shop Online
View Catalogue- FR

——————

Looking for something?

Get the news


Click HERE to download Jo-Jo’s FREE Sketches & Tips Guide

Updates

Receive NEXT-DAY updates by email:

Receive SAME DAY updates by subscribing in a reader:
Click to Subscribe in a reader

Recent Posts

  • Embrace the Journey April 11, 2025
  • For the Books April 8, 2025
  • Beautiful Birthday April 5, 2025
  • Happy Retirement April 2, 2025
  • Frame & Flowers March 28, 2025

Categories

Proud Member…

Inky_Divas800

The content of this blog is the sole responsibility of Josee Smuck as a Stampin’ Up! Independent Demonstrator.  The use of and content of classes, services or products offered is not endorsed by Stampin’ Up! Unless otherwise indicated, images © Stampin’ Up! 1990 – present.

© 2025 Hand Stamped Cards with Josee Smuck-Stampin' Up! Canada Demonstrator | Powered by Superbs Personal Blog theme