Skip to content

Hand Stamped Cards with Josee Smuck-Stampin' Up! Canada Demonstrator

Stampin' Up! Canada Demonstrator; Rubber Stamps & Supplies for Cardmaking & Scrapbooking in Stittsville, Ontario (near Ottawa)

Menu
  • Home
  • JO JO POINTS
  • **Join**
  • Monthly Craft Kit
  • Weekly News
  • Shop Now
  • Contact Me
Menu
Learn how to make this fun scallop border on your stamped cards using Stampin' Up's Seasonal Layers Thinlits dies and Lovely Inside and Out stamp set.

Scallop Borders for your stamped cards

Posted on August 10, 2017August 8, 2017 by Josee

Ever since I bought the Seasonal Layers Thinlits I have been playing with the scallop die in the set to create fun scallop borders. There really are many great die shapes in this set, but I just can't help but love the scallop! Today's card is a fun and simple, stamped friendship card also using the Lovely Inside and Out stamp set from Stampin' Up's NEW 2017-2018 Annual Catalogue.

How To Make This Hand Stamped Card:

Start this card with a base of Thick Whisper White cardstock.

Take a strip of Bermuda Bay cardstock and run it through the Big Shot with the scallop die from the Seasonal Layers Thinlits dies, running it through again on the other side of the strip taking care to line up the scallops so you get a nice border strip. Adhere this to the cardbase.

With Crushed Curry and Bermuda Bay ink stamp the starburst and greeting on Whisper White cardstock and then die cut with the oval die from the Stitched Shape Framelits. Create a mat layer for this greeting by die cutting a scalloped oval using the Layered Ovals Framelits and Crushed Curry colored Color Theory Designer Series Paper.  Adhere these layers together and then adhere them to the cardfront.

Tie a bow out of the Bermuda Bay 3/8" Mini Chevron Ribbon and use a Mini Glue Dot to add it to the greeting layer.

Finally, add some Gold Faceted Gems to the Bermuda Bay scallop strip.

Stampin' Up Stamps:

Lovely Inside and Out stamp set

Stampin' Up Paper:

Thick Whisper White, Whisper White, Color Theory Designer Series Paper Stack

Stampin' Up Ink:

Bermuda Bay Stampin' Pad, Crushed Curry Stampin' Pad

Other Stampin' Up Supplies and Tools:

Seasonal Layers Thinlits, Stitched Shape Framelits, Layering Ovals Framelits, Bermuda Bay 3/8" Mini Chevron Ribbon, Gold Faceted Gems, SNAIL Adhesive, Mini Glue Dots

Try out different ways to use the scallop die from the Seasonal Layers Thinlits dies from Stampin Up.

I hope you are inspired to make some scallop borders of your own! Happy Stamping!

Almost forgot! Tomorrow starts the Fall Into Savings sale on Paper Pumpkin for new subscribers! If you have not tried Paper Pumpkin yet, you can get our gorgeous, autumn-themed September kit delivered straight to your door at 50% off when you join from August 11–September 10. Find out more info and subscribe here.


QUICK LINKS: 

NEW! 2017-2018 ANNUAL CATALOGUE– Download the PDF version or check out the new products in store

NEW! MEMORIES AND MORE and PLANNER KIT product line- check them out here!

CLEARANCE RACK– Save up to 60%

JO JO POINTS– Earn free stamps with my Jo Jo Points Program    

NEW to STAMPIN' UP? Check out my tips here.

Read more

Sharing Sweet Thoughts

Posted on August 8, 2017July 20, 2017 by Josee

If this is your first time on my blog- I'm glad you found me! I hope you will check out my other stamped card ideas- maybe you will get inspired! Today's stamped card features one of my new favorite stamp sets- the Sharing Sweet Thoughts stamp set from Stampin' Up's NEW 2017-2018 Annual Catalogue. Purchasing this stamp set helps Ronald McDonald House Charities! Sharing Sweet Thoughts set from Stampin Up- proceeds from the purchase of this stamp set benefit RMHC!

I love the way this sweet card came together with the Layered Leaves 3D Dynamic Textured Impressions Embossing Folder for the background!

How To Make This Hand Stamped Card:

Start this card with a cardbase of Soft Sky cardstock run through the Big Shot in the Layered Leaves 3D Dynamic Textured Impressions Embossing Folder. This embossing folder gives really deep impression for a gorgeous backdrop.

Next, start assembling your elements for layering. You will need a folded Delicate White Doilie and a strip of Berry Burst 5/8" Crinkled Seam Binding Ribbon. Using the Decorative Ribbon Border Punch, cut a scrap of Lemon Lime Eastern Palace Designer Series Paper.

On a piece of Whisper White cardstock, stamp the jar and berries from the Sharing Sweet Thoughts stamp set using Basic Black ink and color in the berries using Berry Burst and Lemon Lime ink pads and an Aqua Painter. Use the matching Everyday Jar Framelits dies to cut the jar shape.

Stamp the gingham lid from the Sharing Sweet Thoughts stamp set with Berry Burst ink and die cut using the matching die from the Everyday Jar Framelits. Adhere the lid to the jar with a few Mini Glue Dot or some SNAIL Adhesive. Then adhere the jar on top of the other layered elements with Stampin' Dimensionals.

To create the greeting strip

Die cut a strip of Berry Burst cardstock using the banner die from the Cupcake Cutout Framelits. Stamp the greeting from the Sharing Sweet Thoughts stamp set using Soft Sky ink and punch it out using the Classic Label punch. Adhere this punch out to the die cut using Mini Glue Dots.

Lastly, adhere the banner strip to the cardfront using Stampin' Dimensionals.

Stampin' Up Stamps:

Sharing Sweet Thoughts stamp set

Stampin' Up Paper:

Soft Sky cardstock, Berry Burst cardstock, Whisper White cardstock, Lemon Lime Eastern Palace Designer Series Paper

Stampin' Up Ink:

Basic Black ink, Berry Burst Stampin Pad, Lemon Lime Stampin' Pad

Other Stampin' Up Supplies and Tools:

Berry Burst 5/8" Crinkled Seam Binding Ribbon, Classic Label Punch, Layered Leaves 3D Dynamic Textured Impressions Embossing Folder, Everyday Jar Framelits dies, Cupcake Cutout Framelits, Decorative Ribbon Border Punch, Delicate White Doilies, Aqua Painter, Stampin Dimensionals, Mini Glue Dots

Thanks for stopping by today! Make sure you check out the Sharing Sweet Thoughts stamp set in store and support a great charity in the meantime!


QUICK LINKS: 

NEW! 2017-2018 ANNUAL CATALOGUE– Download the PDF version or check out the new products in store

NEW! MEMORIES AND MORE and PLANNER KIT product line- check them out here!

CLEARANCE RACK– Save up to 60%

JO JO POINTS– Earn free stamps with my Jo Jo Points Program    

NEW to STAMPIN' UP? Check out my tips here.

Read more

Bubbly Birthday Card

Posted on August 3, 2017July 20, 2017 by Josee

Today's stamped card is a fun bubbly birthday card using the You've Got Style stamp set from Stampin' Up's NEW 2017-2018 Annual Catalogue.This stamp set just makes me smile! She just looks like she is having so much fun!

A fun stamped birthday card using the You've Got Style stamp set from Stampin' Up.

How To Make This Hand Stamped Birthday Card:

You can start this card by cutting and scoring a base of Thick Whisper White cardstock. Then, take the Polka Dot Basics Textured Impressions Embossing Folder and rub some Daffodil Delight ink from the ink pad all over the raised side of the inside of the embossing folder, and run the cardfront through the Big Shot in this inked up embossing folder. This really makes a fun background for this card.

Next, you can stamp this lovely lady from the You've Got Style stamp set in Basic Black ink and then color her in using the Watercolor Pencils and an Aqua Painter. Once you are done coloring, die cut the stamped image using the Layering Ovals Framelits dies. 

Layer two different sizes of the Metallic Foil Doilies on the cardfront and then add the stamped die cut.

A fun stamped birthday card using the You've Got Style stamp set from Stampin' Up.

Stamp the happy birthday greeting from the You've Got Style stamp set on a strip of Whisper White cardstock and then punch the ends with the Banner Triple Punch.

Punch some Daffodil Delight cardstock using the Decorative Ribbon Punch, making two borders to fit the greeting punch out. Adhere the border with the Fine Tip Glue Pen and then adhere this greeting element to the cardfront with Stampin' Dimensionals.

Stampin' Up Stamps:

You've Got Style stamp set

Stampin' Up Paper:

Thick Whisper White cardstock, Daffodil Delight cardstock, Whisper White cardstock

Stampin' Up Ink:

Basic Black ink, Daffodil Delight Stampin' Pad

Other Stampin' Up Supplies and Tools:

Layering Ovals Framelits Dies, Banner Triple Punch, Decorative Ribbon Border Punch, Polka Dot Basics Textured Impressions Embossing Folder, Big Shot, Metallic Foil Doilies, Stampin' Dimensionals, Fine Tip Glue Pen, Aqua Painter, Watercolor Pencils

I hope you enjoyed today's stamped birthday card using the new You've Got Style stamp set!


QUICK LINKS: 

NEW! 2017-2018 ANNUAL CATALOGUE– Download the PDF version or check out the new products in store

NEW! MEMORIES AND MORE and PLANNER KIT product line- check them out here!

CLEARANCE RACK– Save up to 60%

JO JO POINTS– Earn free stamps with my Jo Jo Points Program    

NEW to STAMPIN' UP? Check out my tips here.

Read more
Carols of Christmas stamp set-perfect for making your own hand stamped Christmas cards, new from Stampin Up

New! Carols of Christmas stamp set, plus Redeem Your Bonus Days Coupons

Posted on August 1, 2017July 20, 2017 by Josee

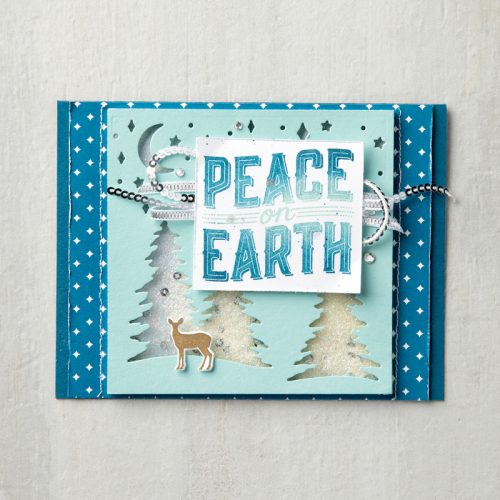
Carols of Christmas stamp set-perfect for making your own hand stamped Christmas cards, new from Stampin UpToday is an exciting day at Stampin' Up! The new Carols of Christmas stamp set & Cardfront Builder Thinlits Dies are now available to purchase— in a money saving bundle price! This new stamp set and die bundle is an early release from the upcoming 2017 Holiday Catalogue. If you love to make your own Christmas cards, you will love this new stamp set!

Check out this video from Stampin' Up showcasing all the fun elements of this amazing new Christmas bundle!

Here are a few samples made with the new bundle, that is available for the month of August!

If you are eager to get a head start on your christmas cards, make sure you check out the Carols of Christmas stamp set in my store.  Don't forget that you can start redeeming your Bonus Days Coupons that you earned in July!


QUICK LINKS: 

NEW! 2017-2018 ANNUAL CATALOGUE– Download the PDF version or check out the new products in store

NEW! MEMORIES AND MORE and PLANNER KIT product line- check them out here!

CLEARANCE RACK– Save up to 60%

JO JO POINTS– Earn free stamps with my Jo Jo Points Program    

NEW to STAMPIN' UP? Check out my tips here.

Read more

Lovely Words and Sweetheart Textured Impressions Embossing Folder

Posted on July 27, 2017July 20, 2017 by Josee

You will love the way today's card comes together so easily with gorgeous results! Using the Lovely Words Thinlits dies and Sweetheart Embossing Folder from Stampin' Up's NEW 2017-2018 Annual Catalogue allows this card to come together for a quick and easy handmade card.

But, before I show you today's card, just a reminder that there is only a few days left to get your Bonus Days Coupons!

And, there are only a few days left to get your FREE Essentials Gift Pack! Check out the details here.

Now, onto today's 'Lovely' card:

How To Make This Hand Stamped Card:

You can start this card off with a cardbase of the Tranquil Tide Fresh Florals Designer Series Paper, cut to 5.5"x 8.5" and scored at 4.25".

Then cut two layers of Whisper White cardstock to 3.5" x 5"- adhere one to the inside of the card, this is where I stamped a sentiment from the Lovely Inside and Out stamp set with Tranquil Tide ink.

Run the second piece through the Big Shot in the new Sweetheart Textured Impressions Embossing Folder– which leaves a lovely debossed heart shape in the middle that perfectly fits the heart shape die cut from the Lovely Words Thinlits– which is die cut next out of Gold Foil Sheet.

Next, the embossed layer is adhered to the cardfront. Then, take some Gold Metallic Thread and wind some around your fingers to get a circle of thread. Add a few Mini Glue Dots to the back of the gold heart die cut and add the circle of thread to it, adding a few more Glue Dots and some of the Fine Tip Glue Pen to the back of the wording before adding it to the card front.

Stampin' Up Stamps:

Lovely Inside and Out stamp set

Stampin' Up Paper:

Whisper White cardstock, Fresh Florals Designer Series Paper, Gold Foil Sheet

Stampin' Up Ink:

Tranquil Tide Stampin' Pad

Other Stampin' Up Supplies and Tools:

Sweetheart Textured Impressions Embossing Folder, Gold Metallic Thread, Lovely Words Thinlits, Fine Tip Glue Pen

Thanks for stopping by the blog! Make sure you take a look around at some of the other handmade cards to inspire you to get stamping!


QUICK LINKS: 

FREE GIFT Essentials Pack– When You Join My Team in July!

NEW! 2017-2018 ANNUAL CATALOGUE– Download the PDF version or check out the new products in store

NEW! MEMORIES AND MORE and PLANNER KIT product line- check them out here!

CLEARANCE RACK– Save up to 60% —NEW products added!!

JO JO POINTS– Earn free stamps with my Jo Jo Points Program    

NEW to STAMPIN' UP? Check out my tips here.

Read more

Posts pagination

  • Previous
  • 1
  • …
  • 190
  • 191
  • 192
  • 193
  • 194
  • 195
  • 196
  • …
  • 587
  • Next

go to store

Promos

Paper Bouquet Kit

josee smuck

Josée Smuck

Stampin’ Up! Canada Demonstrator since 2002
Ottawa, ON, Canada
Contact me with questions!
Josee@StampingJo.com
(613) 831-2917

Current Catalogues

Annual Catalogue (May2024-April2025)Stampin' Up! Annual CatalogueView Catalogue-ENG | Shop Online
View Catalogue- FR

——————

Looking for something?

Get the news


Click HERE to download Jo-Jo’s FREE Sketches & Tips Guide

Updates

Receive NEXT-DAY updates by email:

Receive SAME DAY updates by subscribing in a reader:
Click to Subscribe in a reader

Recent Posts

  • Embrace the Journey April 11, 2025
  • For the Books April 8, 2025
  • Beautiful Birthday April 5, 2025
  • Happy Retirement April 2, 2025
  • Frame & Flowers March 28, 2025

Categories

Proud Member…

Inky_Divas800

The content of this blog is the sole responsibility of Josee Smuck as a Stampin’ Up! Independent Demonstrator.  The use of and content of classes, services or products offered is not endorsed by Stampin’ Up! Unless otherwise indicated, images © Stampin’ Up! 1990 – present.

© 2025 Hand Stamped Cards with Josee Smuck-Stampin' Up! Canada Demonstrator | Powered by Superbs Personal Blog theme