

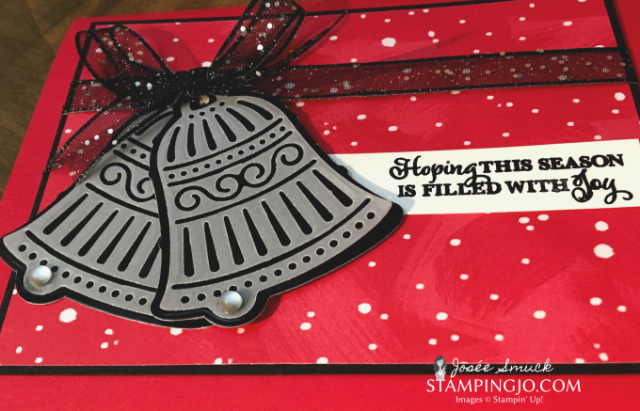
Happy Monday! I hope you had a great weekend. I can’t believe that a month from today is CHRISTMAS!! This card was super fun to put together!! I love the Black Foil and the Vellum Cardstock together on the bells. 
Measurements:
- Real Red: 5 ½” x 8 ½” scored at 4 ¼”
- Let It Snow Designer Paper: 3 ½” x 4 ¾”
- Basic Black: 3 ?” x 4 ?”
- Whisper White: ?” x 2 ¾”
- Ribbon: 6” and 7”
Instructions:
- Fold the Real Red cardstock in half.
- Adhere the designer paper to the Basic Black cardstock using Snail Adhesive.
- Take the 6” ribbon and loop the ends behind black cardstock and adhere the ends to the back.
- Use the Detailed Bells Dies to cut out the Black Foil bells and the Vellum bells.
- Take a piece of Baker’s Twine and tie all the bells together.
- Use a glue dot to glue the bells together and to glue underneath where the frosted droplet will go.
- Adhere the back of the bells with more glue dots and add to the card.
- Make a bow with the glittered ribbon and add on top of the bells using a glue dot.
- Stamp greeting on the Whisper White cardstock, then adhere to card tucking in the left-hand side of the white cardstock under the bells.
- Add the frosted droplets to the bells.
Product List


 Glittered Organdy Ribbon")


QUICK LINKS:
-
-
- WEEKLY NEWSLETTER & TUTORIALS: Sign up for my newsletter to get updates, specials & card ideas!
- JO JO POINTS: Earn free stamps with my VIP reward program!
- New to Stampin’ Up? Check out my STAMPING 101 TIPS here!
- CLEARANCE RACK: Save up to 60% on great products! They have some items in the clearance rack right now!!
-