
Need to create a card and don’t know where to start?
Create your card base in 4 EASY steps!
Step 1: Supplies

*Paper Cutter (Fiskars purchased from SU)
*8 1/2 x 11 piece of cardstock (any colour)
*Scoring blade (black blade on cutter) OR Bone Folder to crease your card.
Step 2: Cutting your Card Base

*Pull out ruller arm from under cutter so that you can see the measurements.
*Lift clear plastic slide and place cardstock under so that the 11 inch side is flat against the side of the cutter. ß11”à
*Line up your cardstock to the 5 1/2″ mark and slide down blade making sure that your cardstock does not move.
*You will be left with 2 card bases measuring 5 1/2″ x 8 1/2″.
Step 3: Scoring your card
Method 1: Bone Folder

*Line up your corners, then use bone folder to smooth out the crease.
(I find the bone folder gives me a nice, neat fold that is slightly more accurate than the scoring blade.)
Method 2: Scoring Blade

*Place cardstock on cutter with the 8 1/2″ side flat against the edge.
*Line up cardstock to the 4 1/4″ mark and gently bring scoring blade (black one) all the way down.
*Make sure you are applying gentle pressure so that you do not cut through the cardstock.
Step 4: Finished Card Base
Two orientations to choose from…portrait or landsape style:


Variation:
*Cut your cardstock to 4 1/4″ x 11″ (again making 2 card bases)

NEXT: Create your Card Front
Step 1: Cutting your cardstock

*Line up the 11″ side to the edge of the cutter and make your first cut at 5 1/4″.
*Take the left over piece (5 3/4 x 8 1/2″) and cut off 1/4″ leaving your with 2 pieces of 5 1/4 x 8 1/2″.

*Line up 8 1/2″ side (on both pieces) to the edge of the cutter and cut making 4 pieces of 4 x 5 1/4″.
Tah Dah…your basics are done-now go decorate!
Here’s an example of a simple card using Garden Whimsy:
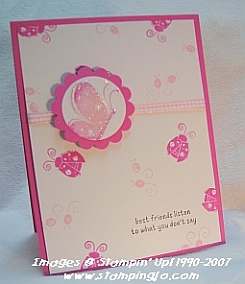
this is so cool and easy not hard. when someone is new we tend to sometimes make them with lots on them, so we dont look cheap but easy is better. doesnt fill their minds full so they are overwelmed and decide not to order just too much. this is an awesome card to show thanks.