Skip to content
Hand Stamped Cards with Josee Smuck-Stampin' Up! Canada Demonstrator
Menu
  • Home
  • JO JO POINTS
  • **Join**
  • Monthly Craft Kit
  • Weekly News
  • Shop Now
  • Contact Me
Menu

Category: Tips & Techniques

Technique Time: Versamark Resist

Posted on October 14, 2010 by Josee

SP2 
 

This week's technique, Versamark Resist, lets you create a lot of different looks with a few basic supplies.

Stampin' Up Supply List

  • Stamps: Autumn Splendor (116503), Thank You Kindly (111700)
  • Ink: Cherry Cobbler (119669), More Mustard (103162), Early Espresso (119670), Cajun Craze (119671), Versamark (102283)
  • Paper: Very Vanilla Cardstock (101650), Crumb Cake (120953), More Mustard (100946), Early Espresso (119686), Cherry Cobbler (119685), Glossy Cardstock (102599)
  • Accessories: SNAIL (104332), Stampin' Dimensionals (104430)
  • Tools: Sponges (101610)

Cardstock Dimensions for this Project

  • Early Espresso
    • 5×10
  • Crumb Cake
    • 5×3
  • Glossy Cardstock
    • Image for stamping 3×3
  • Cherry Cobbler
    • 3.25×3.25
  • More Mustard
    • 3.5×3.5

Technique Directions

  1. Stamp image as desired with Versamark on Glossy Cardstock.
  2. Sponge classic ink over top as desired. The stamped images will resist the ink. Layer multiple colors for a rich effect.

Finishing Touches

  1. Take card base and fold in half.
  2. Gently tear Crumb Cake piece and attach to card base with SNAIL. Stamp greeting in Early Espresso as shown.
  3. Affix stamped panel to Cherry Cobbler and More Mustard pieces with SNAIL. Attach to card with Stampin' Dimensionals.

With dynamic techniques such as this one, keeping the card simple lets the technique stand out! This technique can easily be adapted to create many, many different looks.


The Clearance Rack Blitz is still on until Oct. 18th, don't miss out on some fabulous deals!!!!

When you get to the store, you click on clearance rack


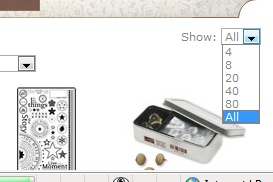
Then click on "show all"


Don't forget to pick up some of the fabulous RED RIBBONS to wrap your Christmas Gifts!!!

Read more

Technique Time: Fall Punch Art

Posted on October 4, 2010October 4, 2010 by Josee

Thanksgiving is nearly here and so is the colder weather. I can't say that I don't like fall, I actually really do…but, it brings me thoughts of winter which I really don't like! Now that we've moved to Winnipeg, I keep chatting with people here who say: "just you wait till winter"…they really are scaring me…lol. I may just have to hibernate for the winter…thank goodness for the internet. Seriously, it can't be that bad?!

Last week we bought my husband a vehicle and my van should be here this week. I can't wait till we have this whole car thing figured out, seems like forever since we've had to borrow and rent cars. I signed up all my kids for activities…sewing, basketball and kindermusik and all the kids seem to have made some friends. I have grass and today I'm getting my fence posts. Things are starting to settle down a bit.

I'm starting to get a bit more organized with Stampin' Up! I'm still a bit behind with emails, etc. (please be patient-I get alot of emails) but I'm pumped to have a productive week this week!

In preparation for Thanksgiving, here's a cute and easy card for you!

  SP2

This week's technique features two fall-themed pieces of punch art, perfect for cards, scrapbook pages and more.

Stampin' Up Supply List

  • Stamps: Teeny Tiny Wishes (115370)
  • Ink: Chocolate Chip Classic (100908)
  • Paper: Very Vanilla Cardstock (101650), Crumb Cake (120953), Pumpkin Pie (105117), Chocolate Chip (102128), Old Olive (100702), So Saffron (105118)
  • Accessories: Old Olive Satin Ribbon (117292), SNAIL (104332), Stampin' Dimensionals (104430)
  • Tools: Big Shot Die Cutting System (113439), Square Lattice Textured Impressions Embossing Folder (119976), Word Window Punch (119857), Punches as outlined below

Cardstock Dimensions for this Project

  • Crumb Cake
    • Card Base: 5.5 x 4.25
  • Old Olive
    • Piece for Embossing: 4.25 x 2.5
  • Very Vanilla, Chocolate Chip, Old Olive, Pumpkin Pie, So Saffron
    • Scraps for punch art

Technique Directions

To create the punch art pumpkin, punch paper as shown:

SP3
 

Assemble pumpkin by layering middle oval on top of other two using SNAIL. Affix stem on back side and add leaf.

To create the punch art sunflower, punch paper as shown:

SP4

Cut scallop circles on each scallop, stagger them and affix together using SNAIL. Curl up petals on top layer. Attach circle to middle of flower and then layer tiny flowers on top.

Finishing Touches

  1. Take card base and fold in half.
  2. On bottom right corner stamp greeting as shown in Rich Razzleberry.
  3. Run 2.5 x 4.25 Old Olive panel through Big Shot with Square Lattice Embossing Folder. Tear to create grass and attach to base with SNAIL.
  4. Attach pumpkin on top of grass using Stampin' Dimensionals.
  5. Attach Old Olive ribbon to card base with SNAIL, tucking bottom edge under the grass.
  6. Attach sunflower on top of ribbon with Stampin' Dimensionals.
  7. Stamp "happy thanksgiving" in Chocolate Chip Classic Ink on Very Vanilla Cardstock and punch out with Word Window Punch. Attach to cardbase with SNAIL.

Punch art is just another fun way to get more out of your tools! Punches help save you time when creating your pages and projects, and the added bonus is there are so many other possibilities!

Don't forget to sign up for my newsletter to receive WEEK 2 of the 12 WEEKS OF CHRISTMAS…it's coming out this Wednesday!

Read more

Product of the Week : Fabulous Fall with French Foliage

Posted on September 29, 2010September 29, 2010 by Josee

The new stamp set French Foliage (W120845/C121166) is a wonderful set for so much more than cards or scrapbooking. This vintage/shabby chic set is ideal for home decor or personal items like a journal as it evokes an atmosphere of nostalgia and fond memories. With French script, a postmark, ink spatter and leaf images it offers a romantic feel for any project.

When you sign up for the 12 weeks of Christmas, you'll receive an email a week with an EXCLUSIVE Christmas project (either a card, tags, gifts or packaging). For each project you'll receive the instructions on how to create it! This offer is ONLY available to newsletter subscribers, so make sure you sign up! (Sorry, back-issues are not available)

Read more

Technique Time: Emboss Resist with Day of Gratitude

Posted on September 28, 2010September 28, 2010 by Josee

  SP1

This week's technique, Emboss Resist, enables you to get a wide variety of looks with some basic heat embossing, sponges and classic ink.

Stampin' Up Supply List

  • Stamps: Day of Gratitude (W120835/C121148)
  • Ink: Rich Razzleberry (115658), Pumpkin Pie (105216), Versamark (102283)
  • Paper: Very Vanilla Cardstock (101650), Rich Razzleberry (115316)
  • Accessories: Antique Brads (117273), Rich Razzleberry 1/8 Taffeta Ribbon (119259), Stampin Sponges (101610), Champagne Mist Shimmer Paint (116806), Gold Embossing Powder (109129), SNAIL (104332), Stampin' Dimensionals (104430)
  • Tools: Big Shot Die Cutting System (113439), Petals a Plenty Textured Impressions Embossing Folder (116824), Heat Tool(100005), Paper Snips (103579), Paper Piercer (161631)
  • Other: Spray Bottle, Rubbing Alcohol


Cardstock Dimensions for this Project

  • Rich Razzleberry
    • Card Base: 4.25 x 4.25
    • Embossed Piece: 2.75 x 4.25
  • Very Vanilla
    • Piece for embossing

Technique Directions

  1. Emboss medallion image from Day of Gratitude with Gold Embossing Powder on Very Vanilla cardstock.
  2. Sponge Rich Razzleberry classic around the edge, and Pumpkin Pie in the centre of the image.
  3. Take a Kleenex to wipe any extra ink off embossed detail.

Bonus Techniques – Shimmer Paint Spray

  1. Place rubbing alcohol in a small spray bottle.
  2. Add 5-6 drops of Shimmer Paint and shake well.
  3. Spray embossed panel with shimmer paint mixture.

Finishing Touches

  1. Take card base and fold in half.
  2. On bottom right corner stamp greeting as shown in Rich Razzleberry.
  3. Run 2.75 x 4.25 Rich Razzleberry panel through Big Shot with Petals A Plenty Embossing Folder. Spray with shimmer paint mixture and set aside to dry.
  4. Cut out emboss resist medallion with paper snips and set antique brad in the middle.
  5. Attach embossed piece to the card base with SNAIL.
  6. Affix Rich Razzleberry ribbon along the seam under the embossed piece with SNAIL, cut off edges so they are square with the edge.
  7. Attach medallion with Stampin' Dimensionals as shown.

Emboss resist offers you the ability to create dramatically different looks depending on the embossing powder and ink you use. With a different color combination, this stamp set can easily be used for multiple seasons.

Being a demonstrator ROCKS, if you've thought about it, believe me…there's no better time then now. You'll get a beautiful tote perfect for organizing your stamping supplies! Click here for more information! AND you'll qualify for the stamp set "Eat Chocolate", a brand new set coming out in the next mini!
What are you waiting for? Click here to join and enter "stampingjo" for the password.


PRIZE PATROL- leave a comment on any post on my blog and at the end of the month I will do a randomn draw to win a free mystery stamp set. (Open to Canadians only, sorry)

Read more

Tip of the Week: Get ready for fall stamping!

Posted on September 3, 2010 by Josee