Skip to content
Hand Stamped Cards with Josee Smuck-Stampin' Up! Canada Demonstrator
Menu
  • Home
  • JO JO POINTS
  • **Join**
  • Monthly Craft Kit
  • Weekly News
  • Shop Now
  • Contact Me
Menu

Category: Big Shot Projects

Swirly Scribbles ‘Marquetry’ card

Posted on June 28, 2016July 12, 2016 by Josee

Hello!

Have you heard of intarsia or marquetry? They are wood inlay techniques that I truly admire the look of. I'm sure it takes quite a bit of talent and patience to create some of the amazing designs out of different types of wood or wood veneers, or differently stained pieces to create those peices of art. When I started out to create this card, Intarsia and Marquetry was what came to mind. It does take a tiny bit of patience and some forethought to get the look, but probably not as much 'talent' required as the Big Shot dies do the really hard work. smiley 

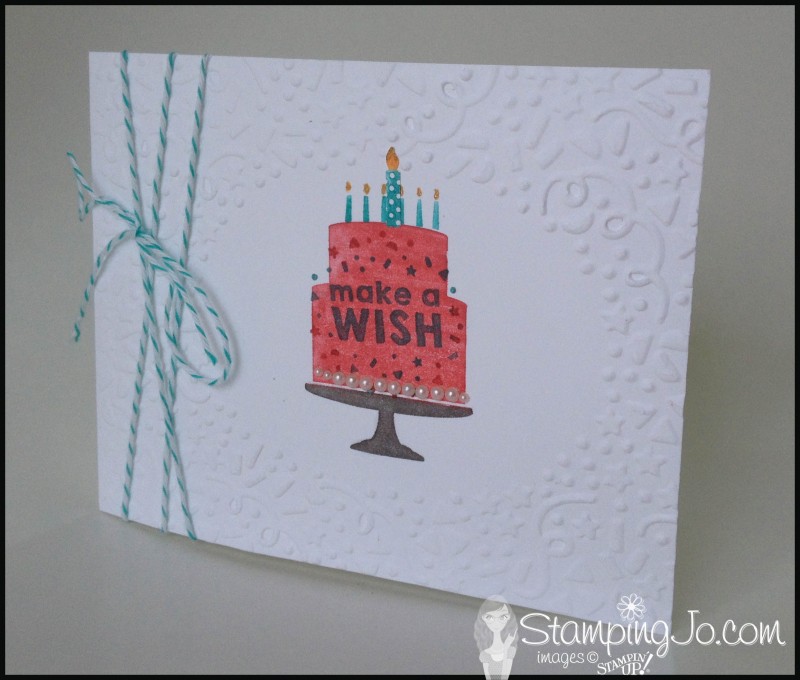
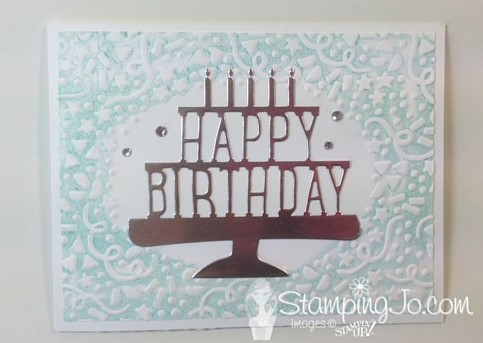
This card was made using the new Swirly Scribbles Thinlits, the Lovely Lace Textured Impressions Embossing Folder and the Greatest Greetings stamp set for the sentiment.

Swirly Bird by StampingJo


How To Make It: 

I started this card with a base of Whisper White Thick cardstock.

On the Peekaboo Peach layer, I layed out the Swirly Scribbles Big Shot dies to get an idea of how I wanted the design to look. Then, I started to run the Peekaboo Peach layer through the Big Shot with the swirly dies, keeping track of the cut pieces as some of them will be used in the final design. 

Then, I cut the same die cuts out of the Playful Palette Designer Series Papers and set those aside. 

I cut the leaves from the Swirly Scribbles dies out of the Peekaboo Peach layer.

Now, behind the Peekaboo Peach layer, I added a full layer of the Emerald Envy cardstock. 

Swirly Bird embossed flower by StampingJo

Before adhering the layers together, I did a dry run and placed all the die cut pieces how I wanted them to go. I laid the Peekaboo Peach layer on the Emerald Envy layer and then started adding the die cut Playful Palette papers, also adding some of the Peekaboo Peach die cuts back in to fill in some of the spaces I did not want to be green. I left some of the 'spaces' empty so the Emerald Envy would show through. 

Once I was happy with the design, I adhered the Emerald Envy layer to the back of the Peekaboo Peach layer and then used the Fine Tip Glue Pen to adhere all the die cuts. 

While I allowed that to dry, I created the sentiment strip with the stamp from Greatest Greetings and then using the Banner Triple Punch I punched the tip and did the same to the mat layer beneath which also uses the Playful Palette Designer Series Paper.  

Once the 'marquetry' layer was dried, I ran it through the Big Shot in the Lovely Lace Textured Impressions Embossing Folder. Then adhered that to the card base and added the sentiment with Stampin' Dimensionals. 

Stamps: 

Greatest Greetings-140706

Paper: 

Playful Palette Designer Series Paper -141657, Whisper White Thick-140272, Peekaboo Peach cardstock- 141417, Emerald Envy cardstock- 141415

Ink:

Memento Tuxedo Black- 132708, Refill-133456

Other: 

Swirly Scribbles Thinlits-141497, Banner Triple Punch- 138292,Lovely Lace Textured Impressions Embossing Folder- 133737, Fine Tip Glue Pen- 138309, Stampin’ Dimensionals- 104430

Thanks for stopping by! 
su blog signature


    hostess code graphic

jojopoints blog post footer

Read more

Party Pop Up Thinlits and Confetti TIEF Birthday Card

Posted on May 13, 2016May 9, 2016 by Josee

Hello! Happy Friday!

What are you up to this weekend? I do hope you have some stamping time laid out for your weekend!

I really can't believe that we are already mid-May! That means there is only 2 more weeks left of the current Stampin' Up catalogues AND that means if you have retiring items on your wish list, you have only 2 more weeks to get them!! 

Now, today's card is an elegant and fairly simple to make card. I actually did not use any stamp sets on this one!  The Party Pop-Up Thinlits make an amazing center piece on this card!

Party Pop Up Thinlits and Confetti Textured Embossing Folder, birthday card, Stampin Up

How To Make It: 

This card starts with a card base of Whisper White Thick. Then, I cut a mat layer of Whisper White– before I ran the sheet through the Big Shot, I took the Pool Party ink pad and rubbed ink along the inside of the Confetti Textured Impressions Embossing Folder, then put the Whisper White sheet in the embossing folder and ran that through the Big Shot. Out came an embossed and colored background piece that was then adhered to the card base.

Then, I used the Party Pop-Up Thinlit to cut a piece of Silver Foil Sheet. Before adding that to the center of the embossed layer, I used Paper Snips to carefully cut off the little bits that would have created the pop up effect. Then, some 2 Way Glue was used to adhere the die cut to the card front. 

To finish the card off, I added some Rhinestones Basics Jewels for a bit of sparkle!

Stamps: 

None!! No stamping on this card!  

Paper: 

Whisper White-100730, Whisper White Thick-104272 , Silver Foil Sheets-132178  

Ink:

Pool Party-126982  

Other: 

Rhinestones Basic Jewels-119247, Confetti Textured Impressions Embossing Folder- 140592, Party Pop-Up Thinlits Dies-140620, 2 Way Glue Pen-100425, SNAIL- 104332, Paper Snips- 103579

Thanks for stopping by!! Have a great day!!

retiring products

     signature


     May Hostess Code to use: PMJ23H6U  

jojopoints blog post footer

Read more

Spiral Flower and Flower Patch Gift Jar

Posted on April 20, 2016April 18, 2016 by Josee

social_retired2016_demo_Apr1816_NA_5

Good Morning! 

Today's project is an amazing gift idea that can be put together fairly quick. The hardest part may be deciding what you will put inside the jar! wink (I would suggest candy or chocolates, or even a makeup 'kit' or nail 'kit', or you might be able to fit a small clothing item in there) This gift jar uses the Flower Patch stamp set and the Spiral Flower Originals Die, along with some wonderful ribbons to create a gift that looks like you spent alot more time making it than you actually will!

Flower Patch, Spiral Flower Die, Stampin Up, Gift Jar, Mothers Day

How to Make It:

1.    Trace lid onto Cucumber crush card stock, cut and adhere to lid. Wrap jar ring with washi tape.
2.    Cut 3 spiral flower dies from the Calypso Coral card stock. Curl die with bone folder and twist into flower shape and secure with hot glue. TIP – Use a pair of needle nose pliers and hold the smallest end of the die, then twist the rest of the flower around the pliers with the smallest piece in the center. 
3.    Punch 3 pansy flowers from Cucumber Crush card stock. Cut each into two pieces: one with 3 petals/leaves and the other with 2 petals/leaves. Fold each into leaf shapes (fold down the center of each petal)
4.    Adhere 3 flowers to the top of the jar lid with hot glue. Tuck a folded piece of ribbon trim into the empty spaces and adhere “leaves” around flowers. 
Top of gift jar, Mother's day, gift idea
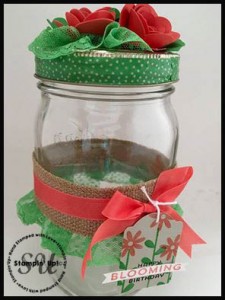
5.    Lay a strip of Tear & Tape adhesive along the top and bottom edges of the burlap trim (long sides). Remove backing from bottom edge and fold ribbon into pleats along the edge. Lay another strip of Tear & Tape over the pleats to hold in place. Remove all backing and carefully wrap around the jar. 
6.    Tie Calypso ribbon around the burlap band, with bow in front. bottom of gift jar, Flower Patch, Mother's day, gift idea
7.    Punch Note Tag from Sahara Sand card stock. Stamp flower petals (Cucumber) and flowers (Coral) at the top of the tag. Stamp “Happy Blooming Birthday” (Espresso) toward the bottom of the tag. Clean word stamp and stamp “Blooming” on white card stock scrap with Calypso Coral. Snip banner ends and adhere over tag. 
8.    Punch 1/16” hole at top of tag, thread 5” white baker’s twine through hole and tie to front of bow on the jar.


Supplies:

Stamp Sets: Flower Patch  (134207)
Inks: Cucumber Crush (138324), Calypso Coral (126983), Early Espresso (126974)
Paper: Calypso Coral (122925), Cucumber Crush (138335), Sahara Sand (122959)
Other:  Spiral Flower Originals Die (129379), Big Shot (113439), Calypso Coral Seam Binding Ribbon (134569), Cucumber Crush Dotted Lace Trim (138423),  1-1/4” Burlap ribbon (132140), Pansy Punch (130698), Cherry on Top Washi Tape (138384), Tear & Tape adhesive (138995), White Baker’s Twine (124262), Note Tag Punch (135860), 1/16” circle punch (134363), Bone Folder (102300), Glue gun and quart jar with lid (wide mouth is best)


Measurements:

Burlap Ribbon: 13”
Ribbon trim: 26” and two 4” pieces
Seam Binding ribbon: 26”
Calypso Coral card stock: 3- 4” squares
Cucumber Crush card stock: 2” x 6” and 4” square (trace lid, cut out and adhere to flat lid)
Sahara Sand card stock: 2” x 2-1/2” 

Thanks for stopping by! Have a wonderful day!

retiring products

     signature


     April Hostess Code to use:  DBBZ2AUS

jojopoints blog post footer

Read more

Party Wishes Birthday Card

Posted on February 12, 2016February 8, 2016 by Josee

Hello! Happy Friday!

As we head into the weekend, I've got a no layer card to end our week of class cards. This card features the Party Wishes Stamp Set and the Confetti Textured Impressions Embossing Folder!

Party Wishes, Confetti TIEF, Baker's Twine, Pearls, Party Punch Pack, Wink of Stella, Stampin Up, hand stamped, hand made card, no layer card, simple card, quick & easy card

How to Make It:

  1. Use the Big Shot to run the Thick Whisper White card base through with the Confetti Embossing folder , try to keep the oval centered
  2. Stamp the cake base in Basic Gray
  3. Stamp the cake in Watermelon Wonder
  4. Use Bermuda Bay and Pumpkin Pie markers to color the candles on the stamp, then stamp on the cake
  5. Stamp the confetti and the sentiment over top the stamped cake- use Bermuda Bay and Watermelon Wonder markers to ink up the stamp
  6. Stamp the larger candle using Bermuda Bay and Pumpkin Pie markers, on a scrap of Whisper White and punch out using the candle punch in the Party Punch Pack
  7. Adhere the candle punch out in the middle of the smaller stamped candles using 2 Way Glue Pen
  8. Add some shine to the cake stand and candle flames with the Wink of Stella pen
  9. Add a strip of Pearls Basics to the bottom of the cake
  10. Wrap Bermuda Bay Baker’s Twine around the card front and tie a bow  

Supplies Used:

Stamps: Party Wishes-140651 wood, 140961 clear-mount

Paper: Whisper White Thick- 140272, Whisper White- 100730 (for punching)

Ink: Stampin’ Write Markers: Bermuda Bay, Pumpkin Pie, Watermelon Wonder, Watermelon Wonder ink-138323,Basic Gray Archival ink-140932; Refill-140929, Wink of Stella-clear-141897

Other: Party Punch Pack-140608, Confetti TIEF- 140592, Pearls Basics Jewels-119247, Bermuda Bay Baker’s Twine-134575, Mini Glue Dots- 103683, Two-Way Glue Pen-100425

Shop for what you need by clicking on each item below, make sure to scroll through to see all the supplies:  


Have a wonderful weekend! I will be back on Monday with the Stamper's Dozen Blog Hop!! 

saleabration footer

   Download the NEW 2016 Occasions Catalogue here!

Shop the New products here!

View the Sale-A-Bration Brochure here!

    signature


     February Hostess Code to use:  Q27EAVTX

jojopoints blog post footer


Read more

Santa’s Gifts Christmas Card

Posted on November 18, 2015November 18, 2015 by Josee
November's HOSTESS CODE is: HHYBZP2P
Use it to qualify for Jo-Jo Points; click to find out more

Good Morning!

If you missed yesterdays announcement about the Holiday Retired list, check it out here. 

Today's card features a Christmas stamp set from the Annual catalogue!

Santa's Gifts, hand stamped, Christmas card, snowflake elements, Merry Moments dsp, Lots of Labels Framelits, Big Shot, watercolor, masking, easy card

This card was started with a base of Thick Whisper White cardstock. I am loving it for card bases! Then adhere the Merry Moments paper onto the card base. 

Stamp Santa on Whisper White, stamp the ‘gift’ using a Post It note ‘mask’ (see tip below) to allow Santa to hold the gift. 

Tip about the Post-It note mask: I also stamped Santa on a little sticky post it note, with the sticky side to the left, then I cut around his hand and front of his body to create the mask. Ideally you don't want to cut the sticky part off. After he was also stamped on the Whisper White, I lay the mask down on top of the stamped image to cover it, then stamped the gift over his hand. When you remove the mask it will look like Santa is holding the gift because you won't see the part of the gift box that is 'in' his hands. 

Run the stamped Whisper White layer through the Big Shot with the Lots of Labels Framelits, and cut the next size up in Cherry Cobbler cardstock. 

Use Aqua Painters and Cherry Cobbler ink to colour the Santa. Tip: You can use a marker and the Aqua Painter (I like to use a clear acrylic block and colour the marker onto it, then pick up the ink with the Aqua Painter), or use a stamp pad by pressing the ink pad onto the lid before sliding it open and picking up the ink with the Aqua Painter, or just use a drop of ink from a bottle of refill ink to ink up the Aqua Painter. 

Adhere to the Cherry Cobbler mat and adhere to the Merry Moments DSP layer.

Stamp the sentiment on Whisper White and punch with the Washi Label punch, adhere to the front of the card. Add a Snowflake Element using the glue dots

Supplies Used: (Items in pink are Retiring products!)

Stamps: Santa’s Gifts Stamp set- 138808

Paper: Whisper White- 100730, Whisper White Thick Cardstock-140272, Cherry Cobbler cardstock-119685

Ink: Cherry Cobbler Stampin’ Write marker-131262 (Regals Collection) or Cherry Cobbler ink pad-126966 or Refill: 119788, Aqua Painters- 103954, Basic Black Archival Ink- 140931, Refill- 140928

Other: Merry Moments Designer Series Paper Stack-139595, Lots of Labels Framelits- 138281, Washi Label punch- 138296, Snowflake Elements- 139638, SNAIL Adhesive- 104332, Refill- 104331, Mini Glue Dots- 103683

Thanks for stopping by! Have a great Wednesday!  

 View the NEW 2015 Holiday Catalogue here!

View the List of Retiring Holiday Products

    Shop the Holiday Catalogue

    signature


    stampingjojojopointsNovember Hostess Code to use: HHYBZP2P

    Earn FREE stamps! Use this monthly Hostess Code to earn JO JO POINTS for every $40 you spend (before taxes & shipping)!

    Click here to learn more about this Loyalty Program!


Read more

Posts pagination

  • Previous
  • 1
  • 2
  • 3
  • 4
  • 5
  • 6
  • 7
  • Next

go to store